Posted on Leave a comment

How to Build a Walking Bass Line as TAB in MuseScore

I’m Toru Hoshino, an upright and electric bassist and instructor based in Tokyo.

In this article, I’ll walk you through how to build a walking bass line as TAB notation using MuseScore.

What Is MuseScore?

MuseScore is free software for writing notation and producing playback audio. It’s really easy to use.

You can download MuseScore here: https://musescore.org/

How to Create a Bass Tab Staff in MuseScore

Once you open the program, here’s the general flow:

① Go to File → New to bring up the New Score wizard.

② Enter whatever title and subtitle you like (in my example I used the title “Bass Tab Score” and the subtitle “For Blog”).

③ Click Next.

Choose a blank score template, then on the instrument selection screen, search for “Bass Guitar” under Plucked Strings and add it.

With the new staff selected, click Add Linked Staff, which adds a second, linked staff under the bass clef staff. Set that second staff’s type to “TAB (4-string, full).”

Click Finish in the bottom right, and you’ll end up with a score like this:
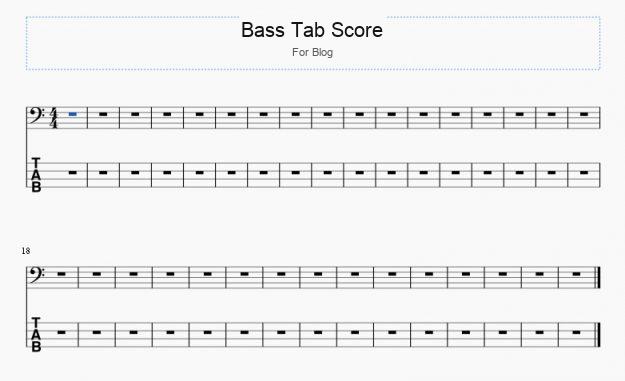
You can enter notes either on the bass clef staff or directly on the TAB staff — both work.

A Useful Trick for Editing TAB

For example, on bass, the note D can be played as the open 2nd string or as the 3rd string, 5th fret.

If you enter a D normally, MuseScore will default to notating it as the open 2nd string (fret 0), like this:

If you want that D notated as the 3rd string, 5th fret instead, first turn off note-input mode (the “N” icon in the top left), then click on the note in the TAB staff and press Ctrl + Down Arrow (Cmd + Down Arrow on Mac). That moves the note to the next string down, giving you the alternate fingering.

Want Personalized Feedback on Your Playing?

This is exactly the kind of thing that’s hard to fix alone — and where having a teacher makes all the difference.

At Line on Bass, I offer an online lesson service where you send me a video of your playing, and I give you specific, detailed feedback — every single day if you want.

Students from around the world are using this to fix exactly these kinds of issues and steadily improve their jazz bass skills.

Check Out the Lesson Service →

Posted on Leave a comment

NANOBASS X4 by PHIL JONES BASS: My Honest Review

Hi, I’m Toru Hoshino, a bass teacher.

This article is basically me saying, “I bought a new amp and I love it.”

This article is for:

· Anyone curious about the NANOBASS X4
· Anyone looking to buy a new amp
· Anyone who wants a solid amp for home practice

If that’s you, I hope this is useful — read on.

The amp I’m covering today is the NANOBASS X4, made by PHIL JONES BASS.

· It’s small
· It doubles as a Bluetooth speaker
· It’s got real power

are the things I really love about it.

It’s a perfect amp for home practice, so I wanted to write up a review.

It’s Small

16 cm wide x 20 cm tall x 19.7 cm deep

That’s the size we’re talking about.

16 cm wide is about the size of my phone, lol.

It’s so small that I was genuinely surprised when I unboxed it.

I’ve tried a number of these compact amps before, and the one thing that always bothered me was the low end breaking up because of the small cabinet size.

But with this one, you don’t need to worry about that at all.

It puts out a genuinely punchy low end. Check the video further down to hear it in action. ^^

It Doubles as a Bluetooth Speaker

The amp itself works as a Bluetooth speaker, so you can connect it wirelessly to your phone and play, say, a YouTube track through it.

The sound quality over Bluetooth is great, and the low end holds up just as well — very on-brand for PHIL JONES BASS.

On top of that, you can stream a backing track over Bluetooth while playing your bass through the same amp at the same time, so this one amp alone is enough to practice efficiently along with a reference track.

It’s Got Real Power

Despite being small, it doesn’t break up on the low end and delivers a genuinely powerful, high-quality bottom.

It holds a solid low end even with a 5-string’s low B or with an upright bass.

Tone is hard to describe in text, so here’s a quote from the manufacturer’s own description:

“It took time to find the right balance and sound — pushing right up against the physical limits of such a tiny enclosure while still delivering the authentic PJB bass tone our standards demand. Tuning the dedicated passive radiator and speaker, adjusting the sound and controls — we went through countless revisions over two years before we finally arrived at a sound we were satisfied with.”

That’s what they say.

And reading that is exactly what got me to buy it. (lol) Total sucker for good marketing copy. (^o^)

Anyway, I also reviewed this amp on video, so if you’re curious, take a look below. ^^

Also Covered on YouTube

If you want to get a sense of how loud/full this thing actually sounds, definitely check out the video.

Want Personalized Feedback on Your Playing?

This is exactly the kind of thing that’s hard to fix alone — and where having a teacher makes all the difference.

At Line on Bass, I offer an online lesson service where you send me a video of your playing, and I give you specific, detailed feedback — every single day if you want.

Students from around the world are using this to fix exactly these kinds of issues and steadily improve their jazz bass skills.

Check Out the Lesson Service →

Posted on Leave a comment

I Practiced at Home With a Double Bass Mute for a Month — Did I Get Noise Complaints?

Hi, I’m Toru Hoshino, a bass teacher.

In this article, I (living in a one-room apartment in Tokyo at the time, in 2017) tested whether practicing upright bass at home with a double bass mute would actually get me complaints from neighbors.

This article is for:

· Anyone curious about trying a double bass mute

· Anyone worried that practicing upright bass might bother their neighbors

If that’s you, I hope this is useful — read on.

To give you the conclusion up front: no, I didn’t get any complaints.

The Double Bass Mute

You attach the mute to the tip of the bridge like this.

Even just this mutes the sound quite a bit. It might be hard to tell from a description alone, so I recorded myself bowing an open string with and without the mute.

Before muting:

After muting:

These were recorded with an iPhone placed about 30 cm (roughly a foot) from the instrument, using the default voice memo app.

In the end, whether you’ll get complaints or not really comes down to your specific living situation. Even with a mute on, the bass still puts out a noticeable amount of sound, so it’s not the case that “if you use a mute, you’ll never get a complaint, guaranteed.” That said, as someone who practices daily in a Tokyo apartment while staying mindful of my neighbors, here’s what I keep in mind.

I hope this gives you a useful reference point if you’re thinking about practicing upright bass at home.

What I Keep in Mind When Practicing With a Mute

Practice When Neighbors Are Likely Out

My neighbors seem to be out at work on weekdays, so I practice during weekday daytime hours.

No Playing at Night

I try to wrap up by around 7 PM, since I’d rather not draw attention to myself.

Treat It as Short-Session Practice Only

When I have a free 30 minutes or so, I’ll work on intonation or repeat a phrase a few times.

When I can carve out two or three hours, I head to a rehearsal space where I can actually play at full volume.

Does a Mute Fully Eliminate the Sound?

No, not completely. For reference, the unplugged acoustic sound of a Yamaha SLB series silent bass is far quieter than a muted acoustic upright.

If your neighbors are particularly sensitive to noise, they may still complain.

That said, a lot of people who buy a mute end up saying “huh, it’s not as quiet as I expected,” so I’d recommend trying one out at a music shop before buying.

Want Personalized Feedback on Your Playing?

This is exactly the kind of thing that’s hard to fix alone — and where having a teacher makes all the difference.

At Line on Bass, I offer an online lesson service where you send me a video of your playing, and I give you specific, detailed feedback — every single day if you want.

Students from around the world are using this to fix exactly these kinds of issues and steadily improve their jazz bass skills.

Check Out the Lesson Service →

Posted on Leave a comment

I Put Two Basses in a MONO Case and Weighed Myself — The Result Was Incredible

Hi there.

I’m Toru Hoshino (@jazzbassisttoru), a bass instructor.

I put two basses into a bass case and weighed myself with it on. The result was pretty incredible.

The MONO Bass Case

For work, I often need to bring two electric basses with me, so I bought a case that can hold two at once.

It’s MONO’s “M80 Dual Bass Guitar Case BLK M80-2B-BLK” — a gig bag built to hold two basses at once. I bought mine online.

Loading Two Basses

You load one bass in from each side, like this.

The padding is thick.


Inside, there’s a neck holder and cushioning to keep things secure.

The pockets are big too — there’s plenty of room for a fake book and two cables.

Time to Weigh Myself

So, I loaded the basses into the case — and it’s seriously heavy.

I decided to go weigh myself with it on.

I don’t have a scale at home, so I borrowed one from a share house I used to live in.

Here’s what it looked like carrying it on my back.

From behind:

From the side:

It’s about as thick as my face.

I could still ride a bike with it on, at least.


The Moment of Truth

Here’s my weight before:

About 55kg with clothes on. (Sorry about the weird socks.)

Alright, here goes!


Σ(゚д゚lll)

66kg!!

An 11kg increase!!

That was the result.

The case alone weighs about 4kg.

So loading two basses into MONO’s bass case — the “M80 Dual Bass Guitar Case BLK M80-2B-BLK” — adds about 11kg to your total weight, confirmed by actual experiment.

Every case I’ve owned before this one eventually had its strap give out, so this time I’m hoping it holds up for the long haul.


Want Personalized Feedback on Your Playing?

This is exactly the kind of thing that’s hard to fix alone — and where having a teacher makes all the difference.

At Line on Bass, I offer an online lesson service where you send me a video of your playing, and I give you specific, detailed feedback — every single day if you want.

Students from around the world are using this to fix exactly these kinds of issues and steadily improve their jazz bass skills.

Check Out the Lesson Service →

Posted on Leave a comment

Organizing Sheet Music Made Easy With CamScanner

This article is written by Toru Hoshino, a bassist and instructor based in Tokyo, who plays both upright and electric bass.

Sheet music piles up fast, and keeping it organized can be a real hassle.

That’s where an iPad app called “CamScanner” becomes incredibly handy for managing your charts.

Managing Sheet Music with CamScanner

CamScanner is a free app for managing your sheet music.

https://itunes.apple.com/us/app/camscanner-document-scanner/id388627783?mt=8
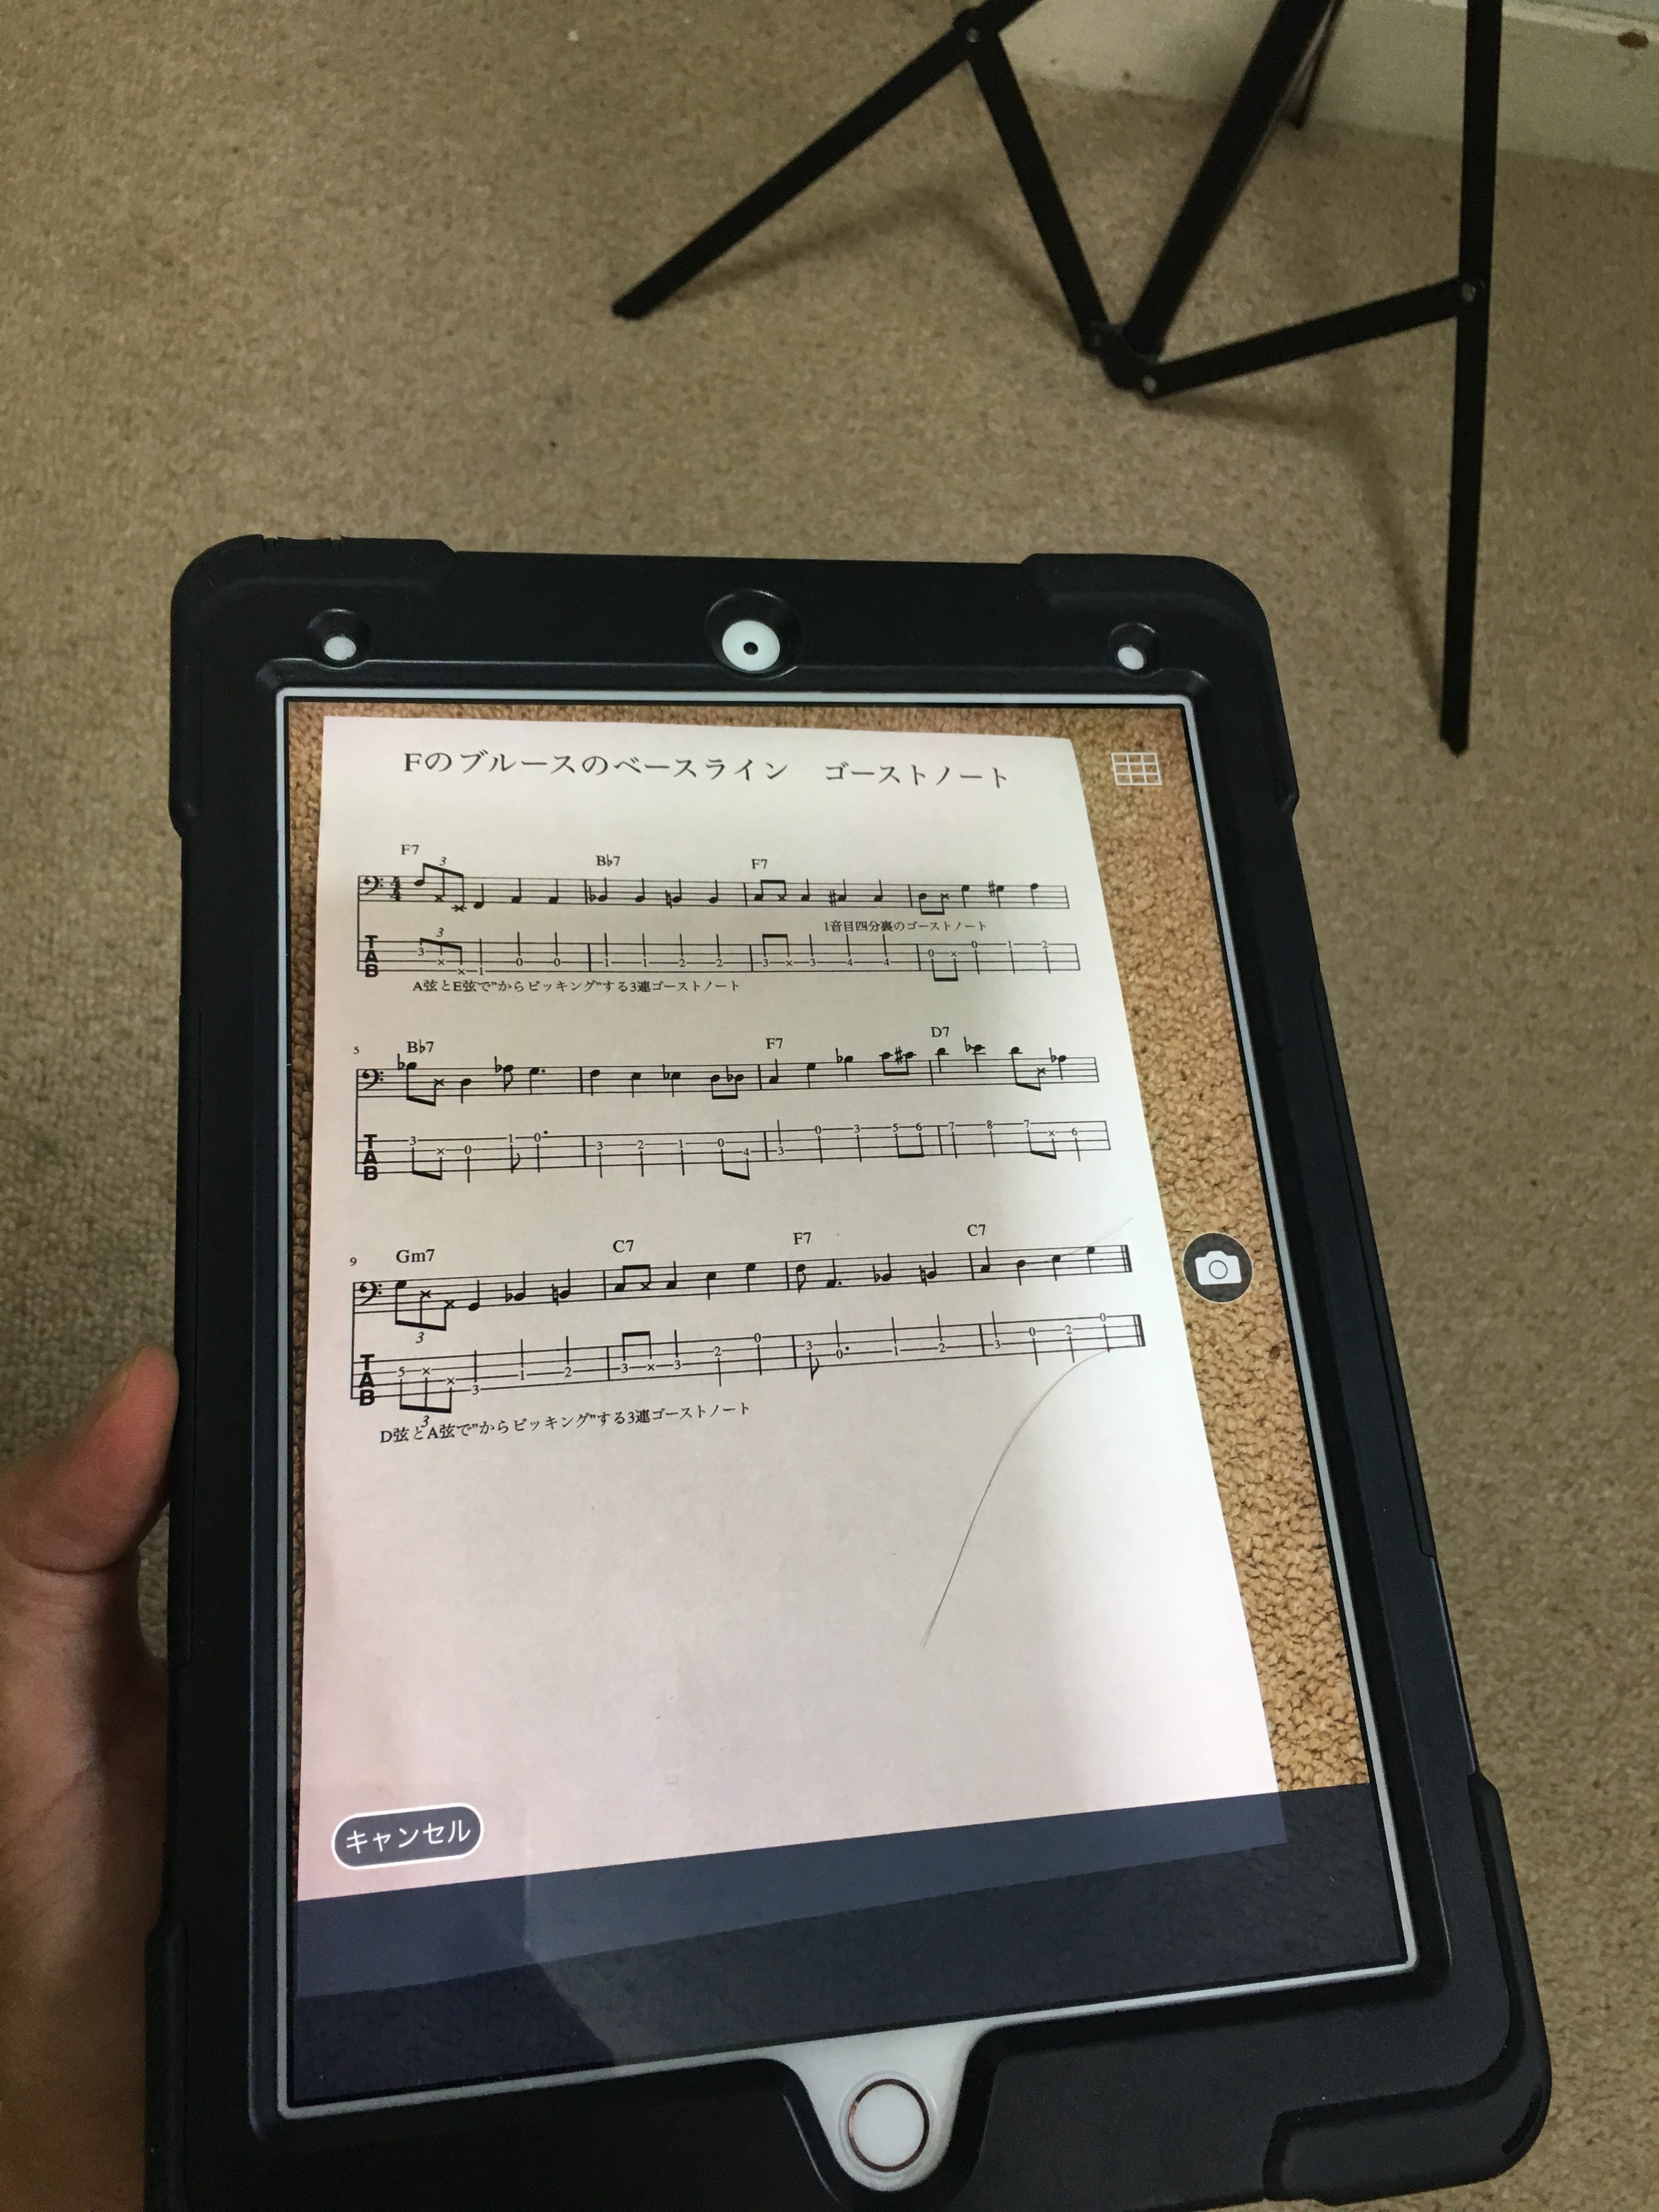
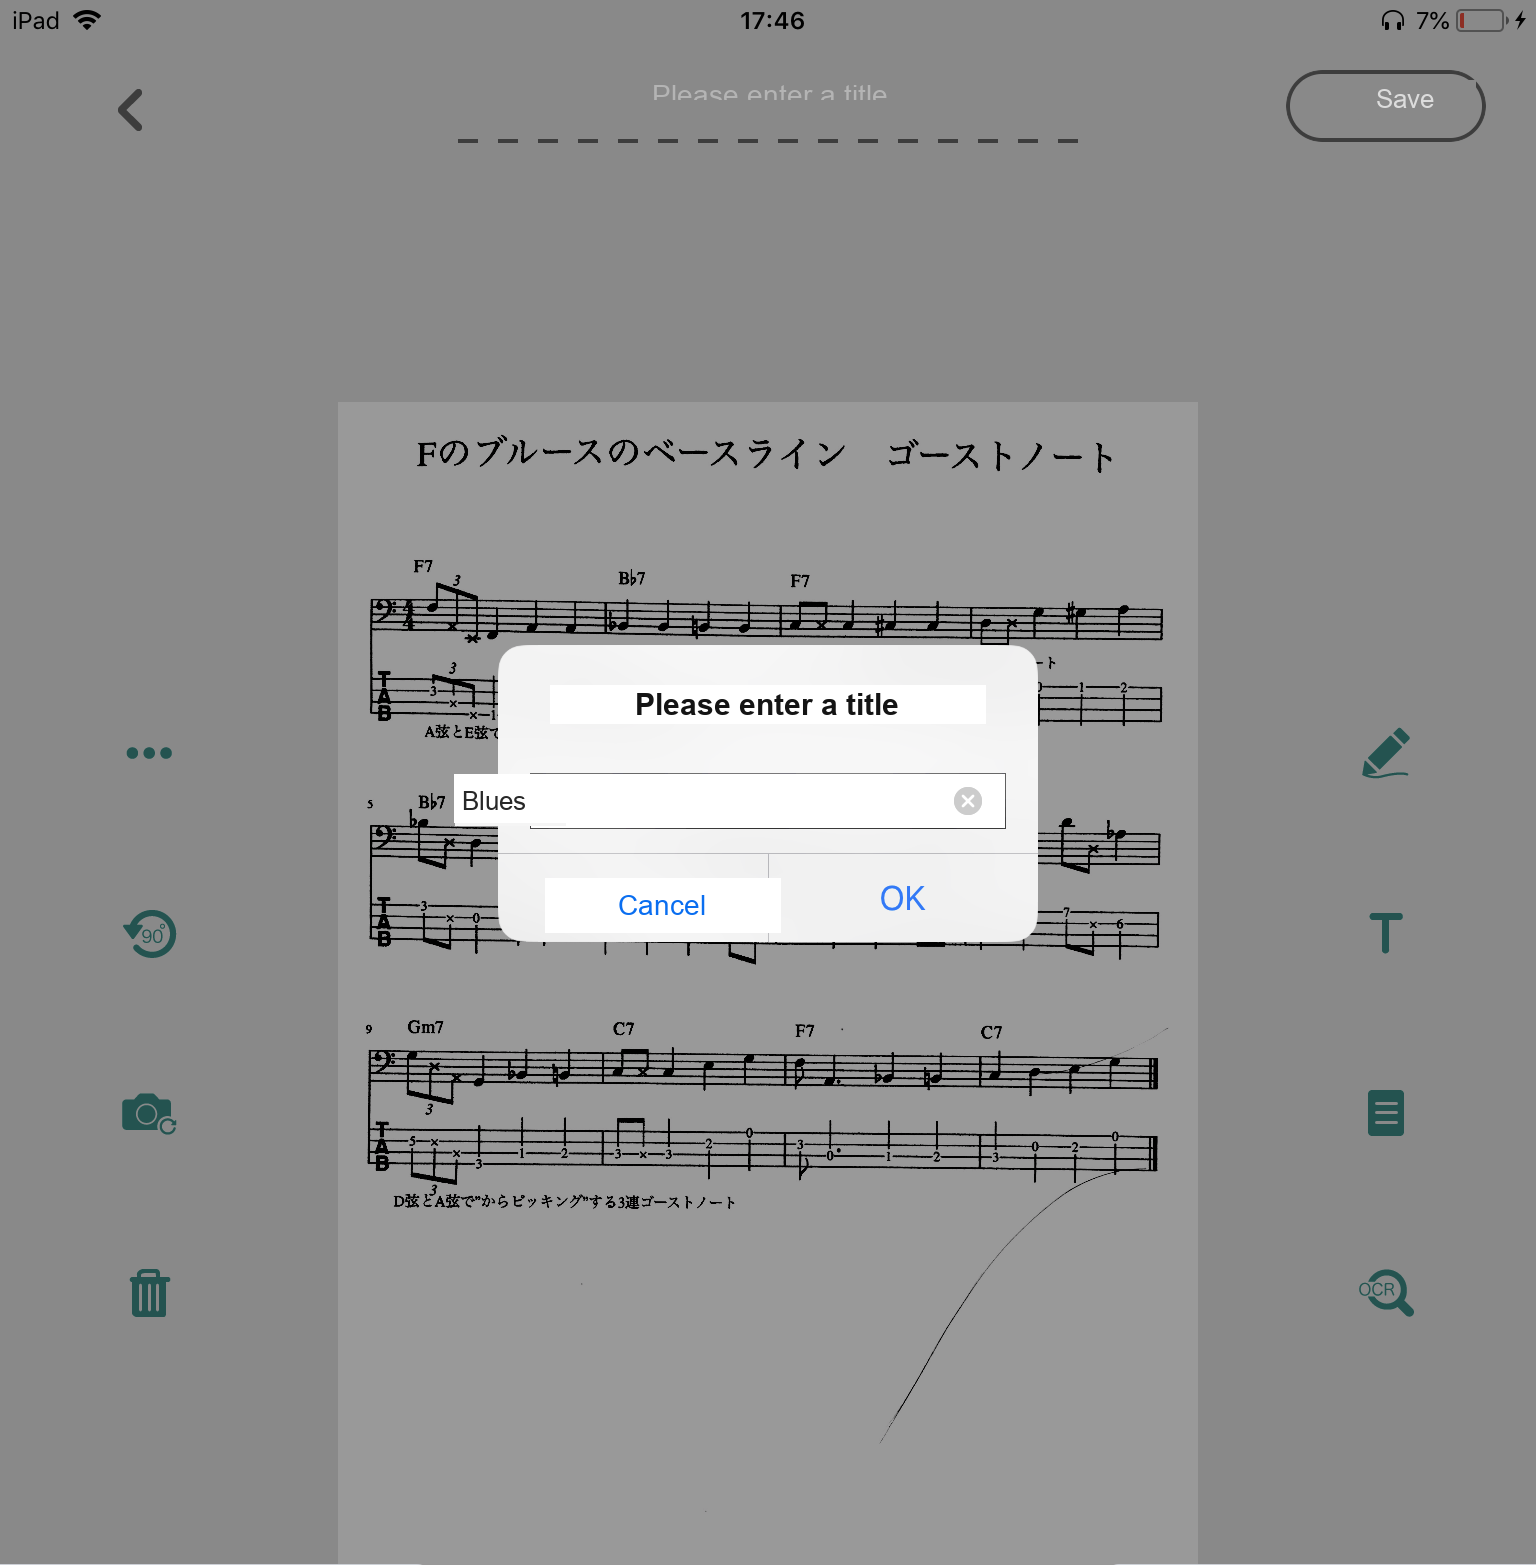
Take a photo of your sheet music, and

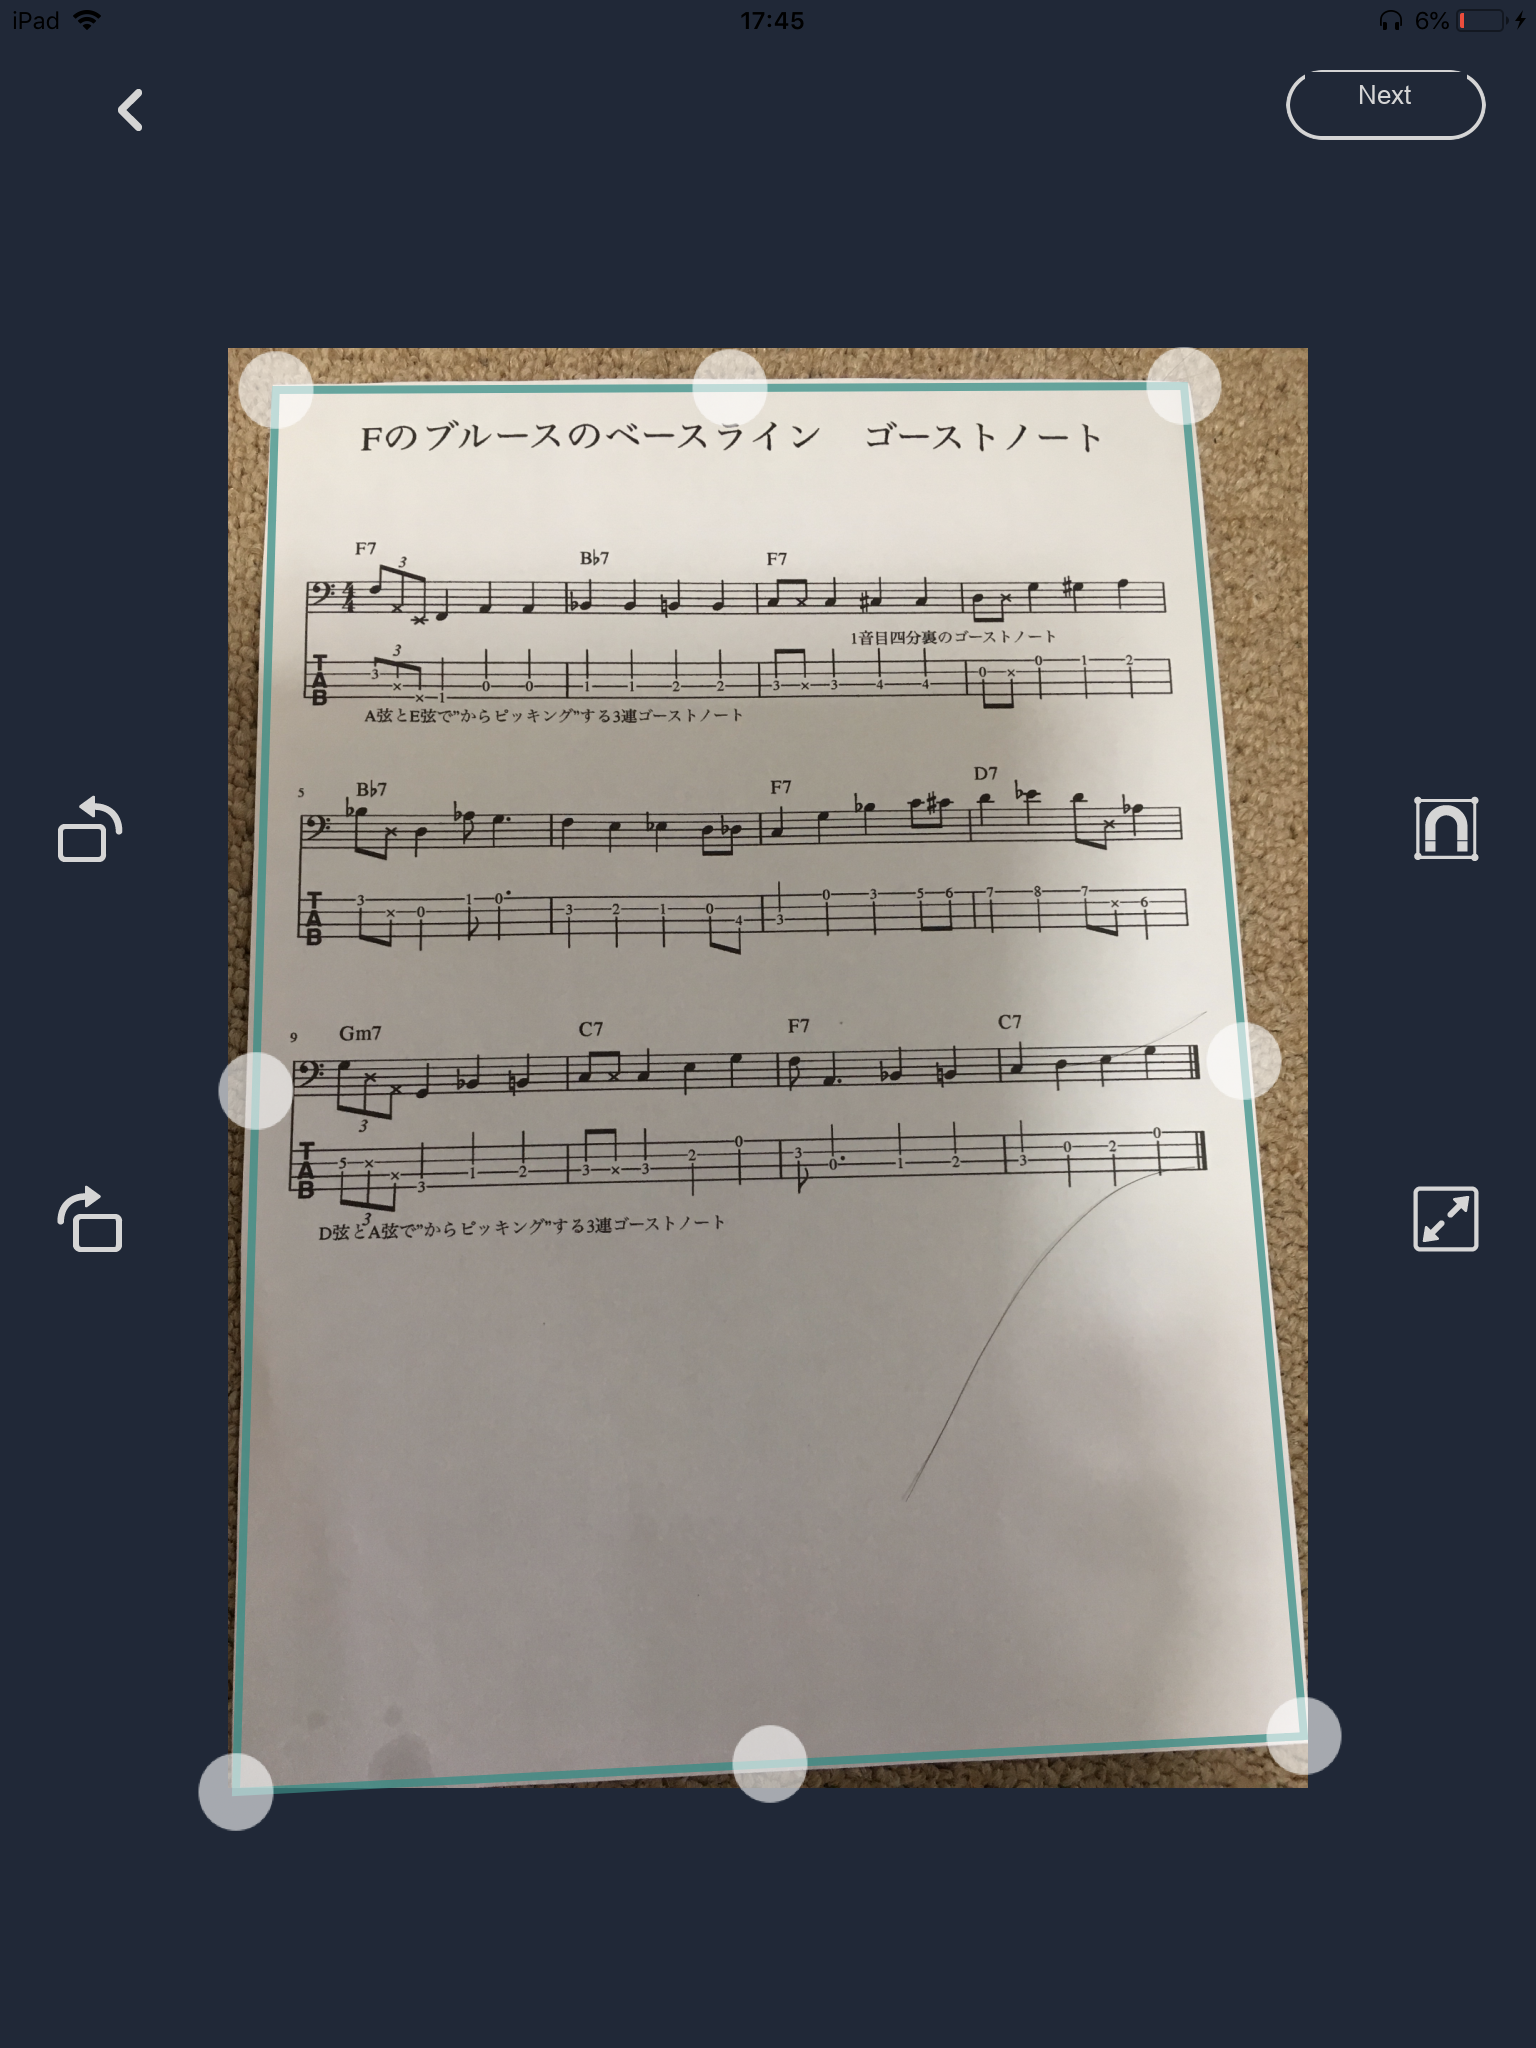
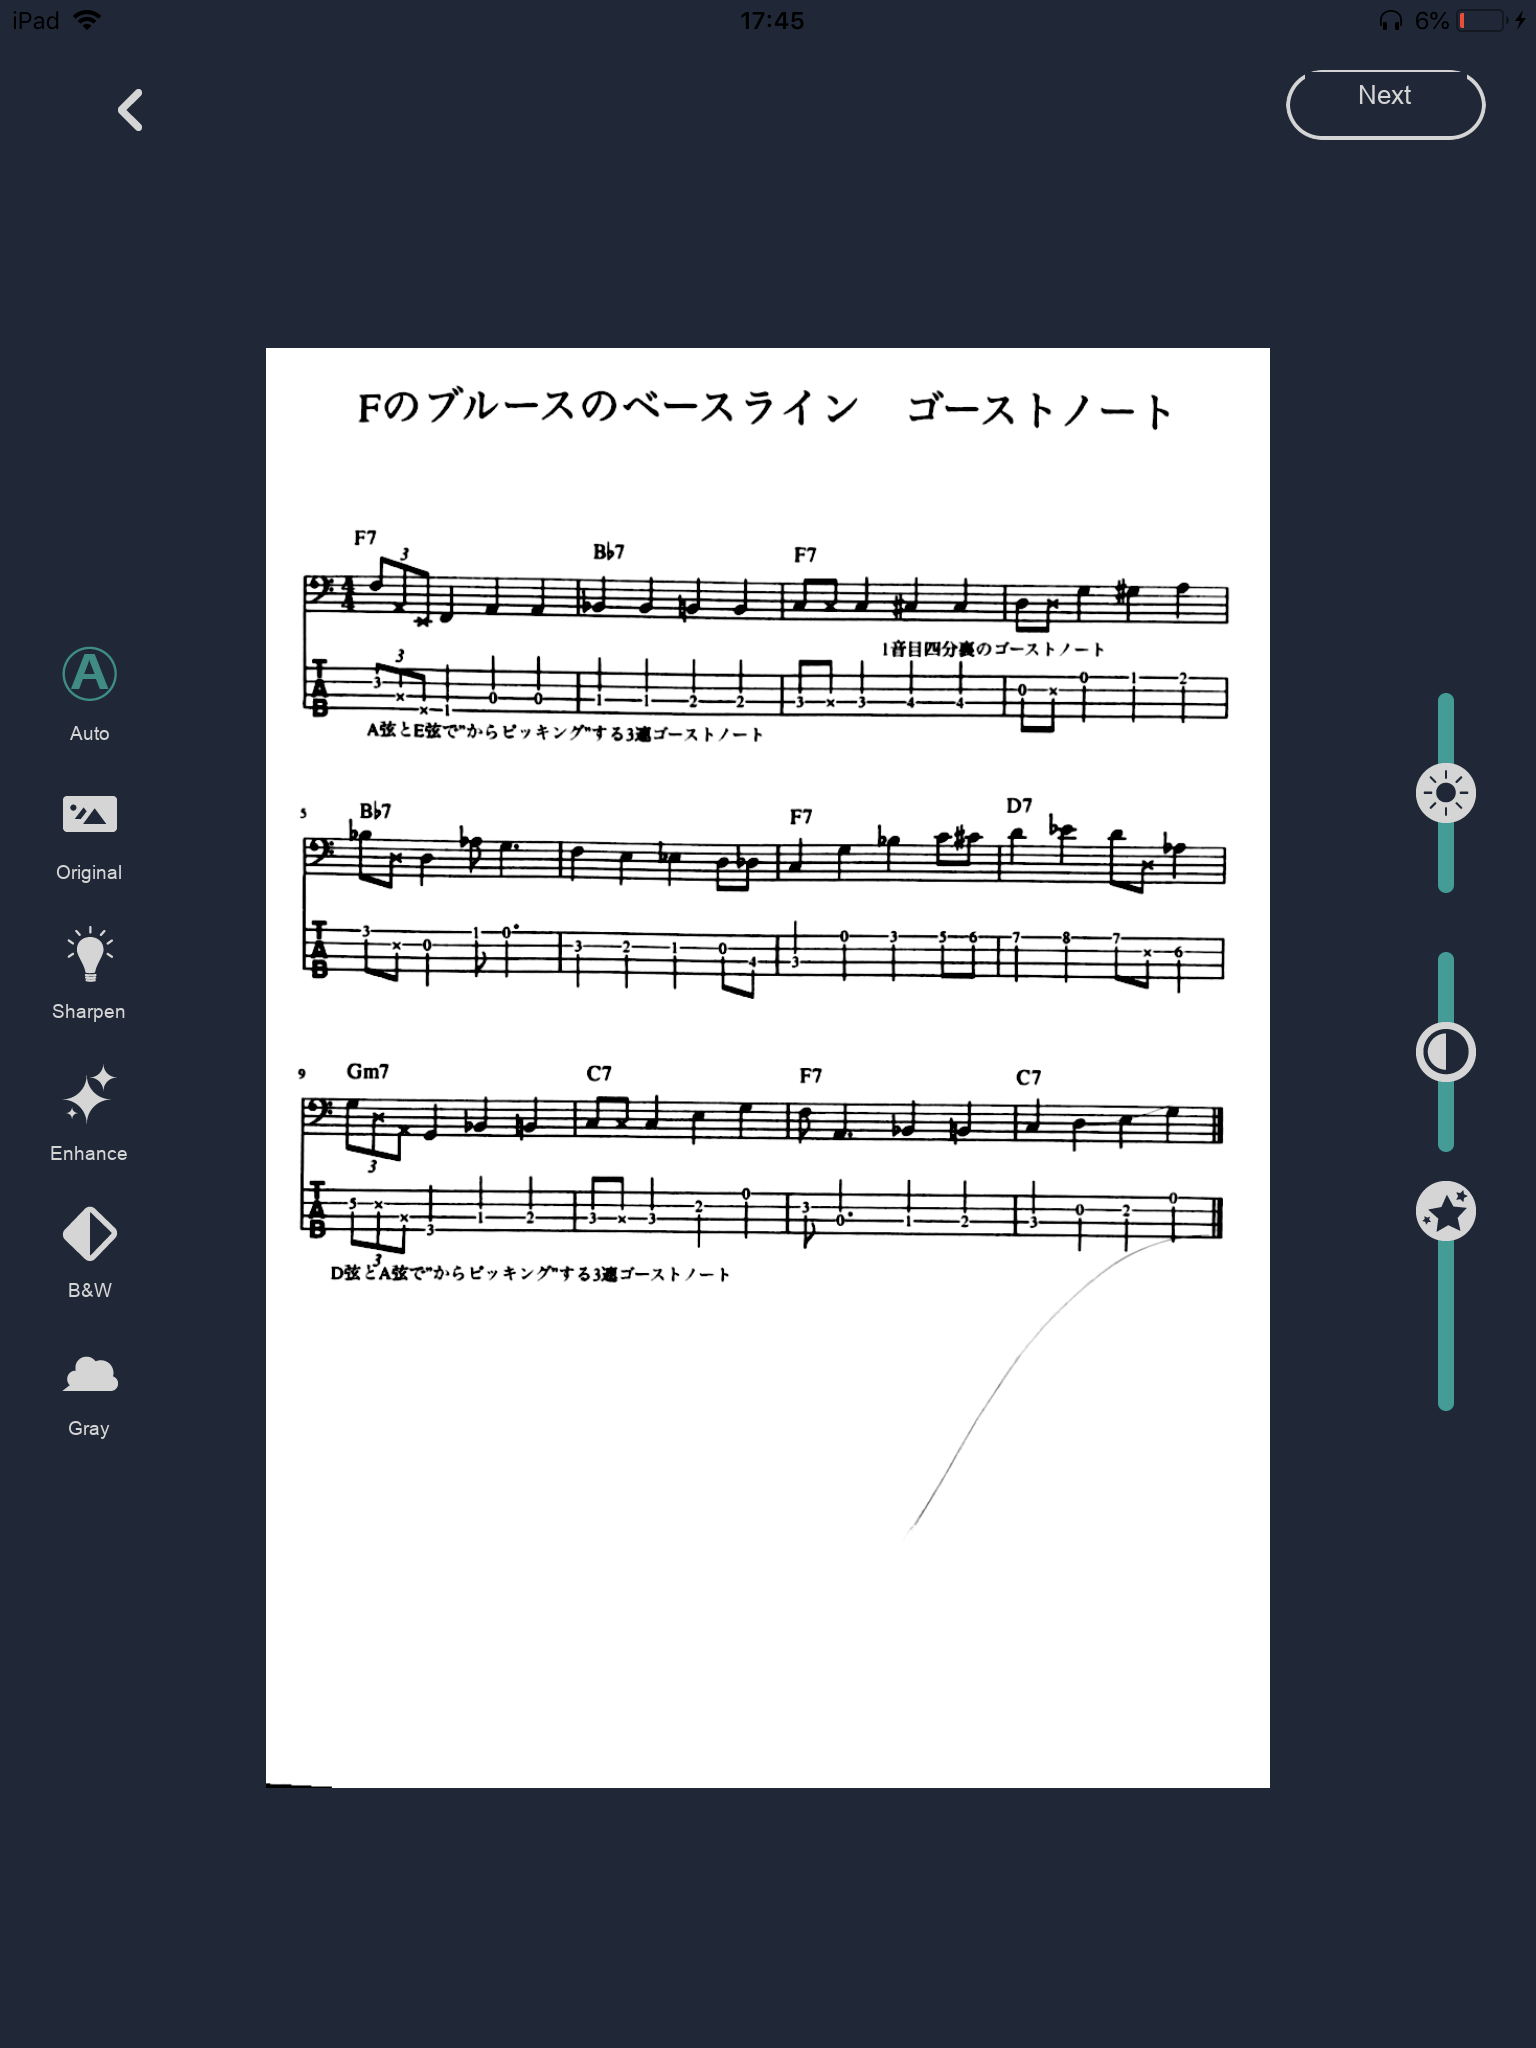
it scans it automatically.

Then just save it under a name.

That’s all there is to it.

No Wi-Fi Needed to Manage Your Charts

Cloud services like iCloud or Dropbox make saving easy, but they require Wi-Fi. That can be inconvenient at times if you’re on a SIM-only device.

CamScanner, on the other hand, is handy because you can open your files even without an internet connection.

If you stay in the same group for a long time, your sheet music really piles up,

so it’s worth making good use of a convenient app like this.

I hope this helps with your daily practice.

Want Personalized Feedback on Your Playing?

This is exactly the kind of thing that’s hard to fix alone — and where having a teacher makes all the difference.

At Line on Bass, I offer an online lesson service where you send me a video of your playing, and I give you specific, detailed feedback — every single day if you want.

Students from around the world are using this to fix exactly these kinds of issues and steadily improve their jazz bass skills.

Check Out the Lesson Service →

Posted on Leave a comment

My Impressions After a Week on Flatwound Strings, As a Bassist Who Used Only Roundwound for 10+ Years

This article is written by Toru Hoshino, an upright bassist, electric bassist, and instructor based in Tokyo. I originally wrote it back in 2016.

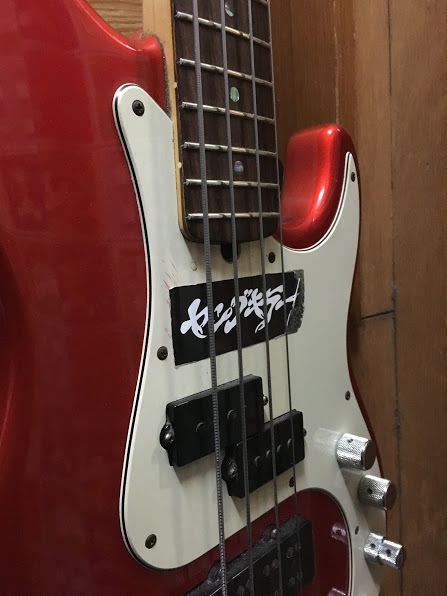
A while back, I put a set of flatwound strings on my main P-bass for the first time.

I’d like to share my impressions after playing on flatwounds for a week.

Before that, though, let’s go over the difference between roundwound and flatwound strings.

The Difference Between Roundwound and Flatwound Strings

This is the kind of thing you’d see explained in a bass magazine.

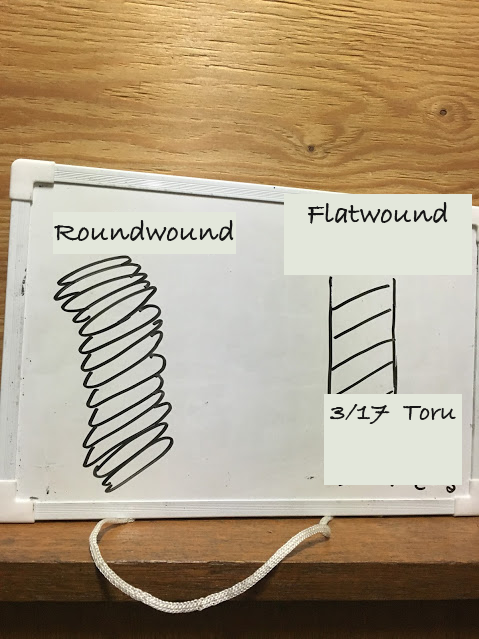
It comes down to a difference in string construction. Here’s a sketch I made to illustrate it.

Standard Roundwound

Roundwound strings are made by winding a thin, round wire around a core, and they’re the type used most widely on bass and guitar. They have a textured, slightly rough feel to the touch. They’re known for great sustain, with a bright tone and a fast attack. Whether it’s the punchy attack of a slap thumb, a snappy pull, or finger-style and pick playing, you get a sound rich in harmonic overtones. It’s fair to say that the vast majority of electric bass tone you hear comes from roundwound strings.

Flatwound, With Character

Flatwound strings, on the other hand, use a flat winding wire wrapped around the core, giving them a smooth surface with no texture. The tone is rounder, with the highs rolled off and a thicker midrange and low end. Rather than a modern, bright sound, it leans toward a vintage ’60s-’70s tone — the kind associated with funk and Motown-era recordings. Some players string up flatwounds specifically to chase that sound.

Which one you use really comes down to personal preference, but the vast majority of strings on the market today are roundwound. I didn’t even know flatwound strings existed until I started playing jazz.

Why I Switched From Round to Flat

It was the squeak.

It’s not an issue when I’m playing walking bass or a bass solo within an ensemble, but since I also do solo bass playing, that finger-squeak noise started bothering me.

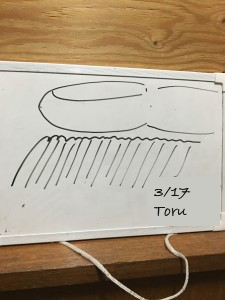
When shifting position with the fretting hand, the texture of roundwound strings creates friction between the ridges of the winding and your finger, which is what causes that squeaking sound.

Alright, now for what you’ve been waiting for — my impressions.

My Impressions After a Week, As a Bassist Who’d Used Nothing but Roundwound for Over 10 Years

No Slide

Since the surface is coated and smooth, I figured it would slide easily under the fingers — but it’s actually the opposite. It barely slides at all. I was tempted to reach for some Finger Ease just to get around. It’s taking me a while to get used to it (and honestly, I still haven’t).

Slower Attack

Compared to roundwound, it’s a subtle difference, but through an amp, where a roundwound string gives that immediate “boi-i-i-ng” resonance the instant you touch it, the attack on flatwound feels more settled and composed. It feels like the rough edges and the excess overtones have been smoothed away.

Those are my two main impressions. Not particularly positive, not particularly negative — more of a “good and bad, both at once” kind of feeling.

The Flatwound Strings I Used

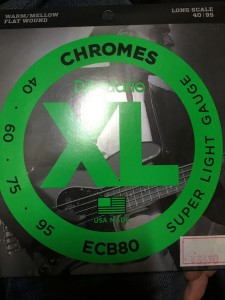
I went with D’Addario Chromes, the lightest gauge they make — 40-60-75-95.

Want Personalized Feedback on Your Playing?

This is exactly the kind of thing that’s hard to fix alone — and where having a teacher makes all the difference.

At Line on Bass, I offer an online lesson service where you send me a video of your playing, and I give you specific, detailed feedback — every single day if you want.

Students from around the world are using this to fix exactly these kinds of issues and steadily improve their jazz bass skills.

Check Out the Lesson Service →

Posted on Leave a comment

A Handy Wheeled Cart for Transporting Your Upright Bass: The Bass Buggie

This article is written by Toru Hoshino, an upright bassist and instructor based in Tokyo. In it, I want to introduce a handy wheeled cart for transporting an upright bass — the Bass Buggie.

A Handy Set of Wheels for Transporting Your Upright Bass: The Bass Buggie

An upright bass is heavy, and hauling it around can be a real pain. This is a way to strap a set of wheels directly onto the bass so you can roll it instead of carrying it.

How to Attach the Bass Buggie

Attaching it is simple.

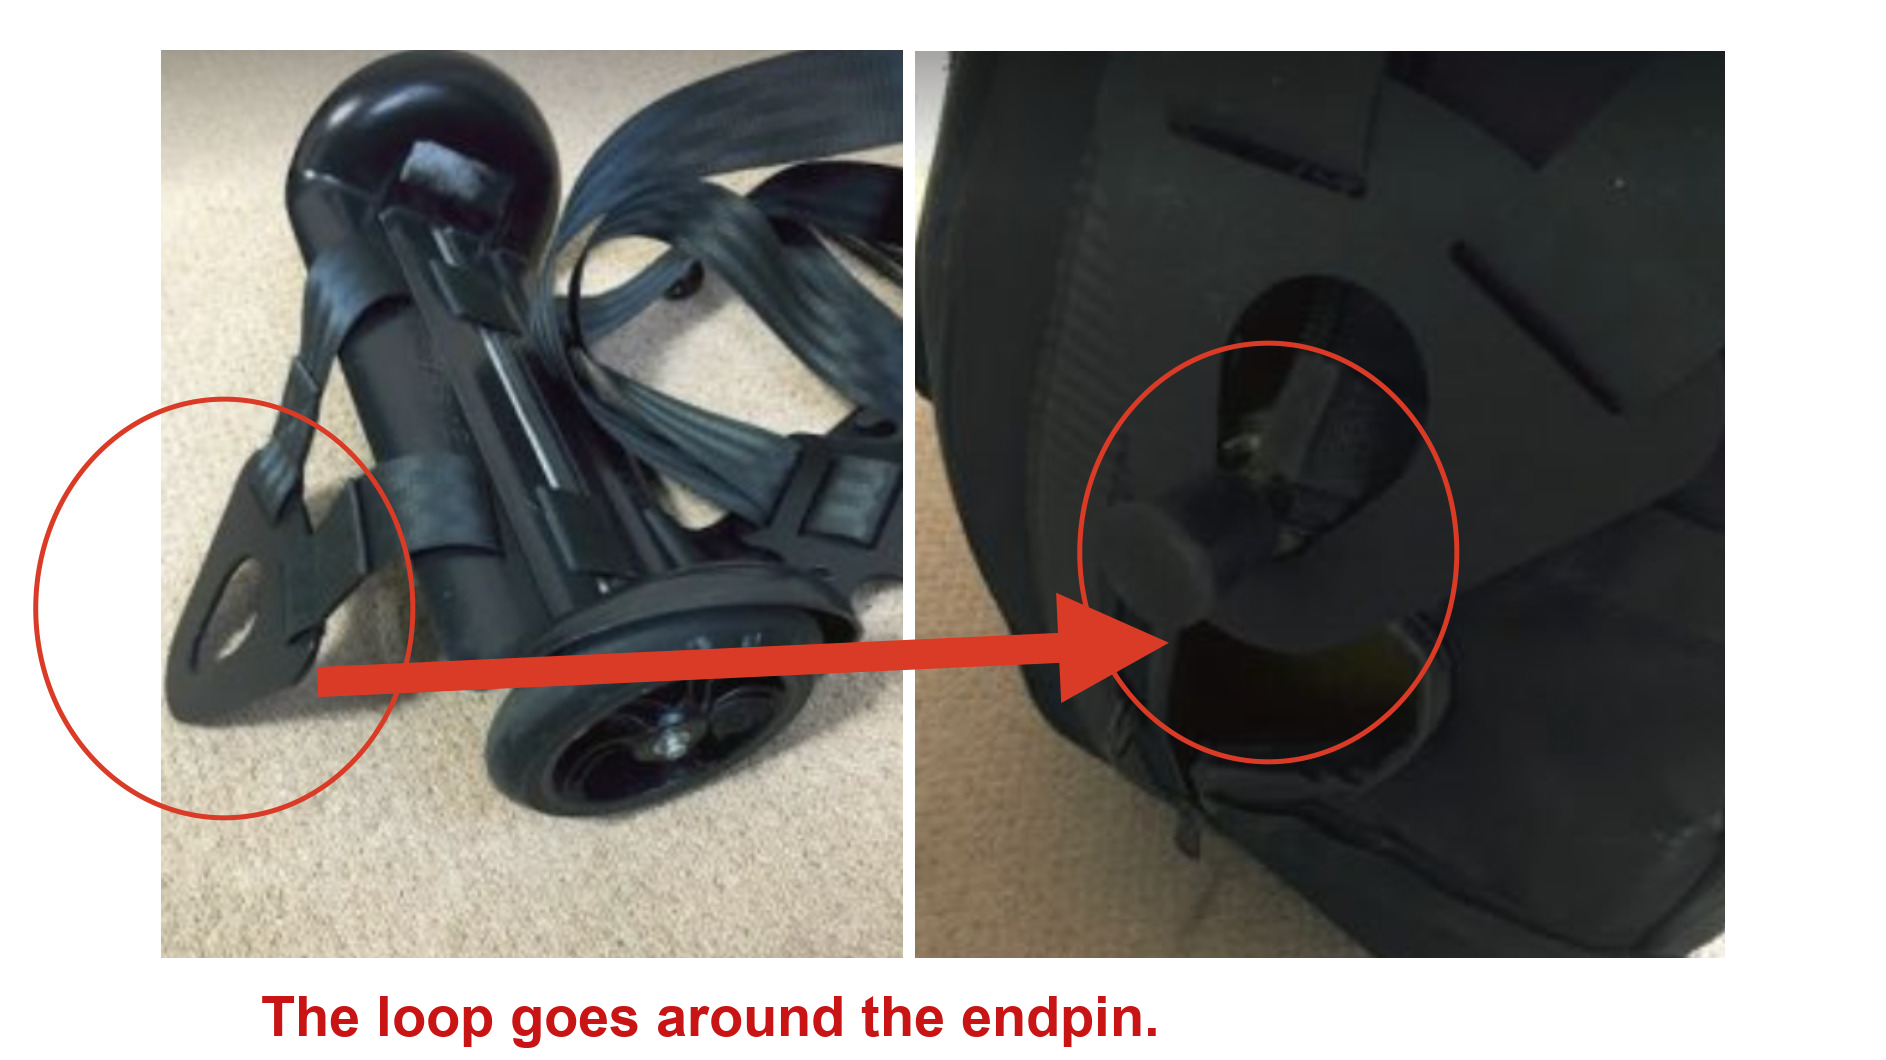
Take the loop on the Bass Buggie itself (the red circle on the left in the photo) and slip it over the endpin.

The triangular bracket fits onto the endpin,

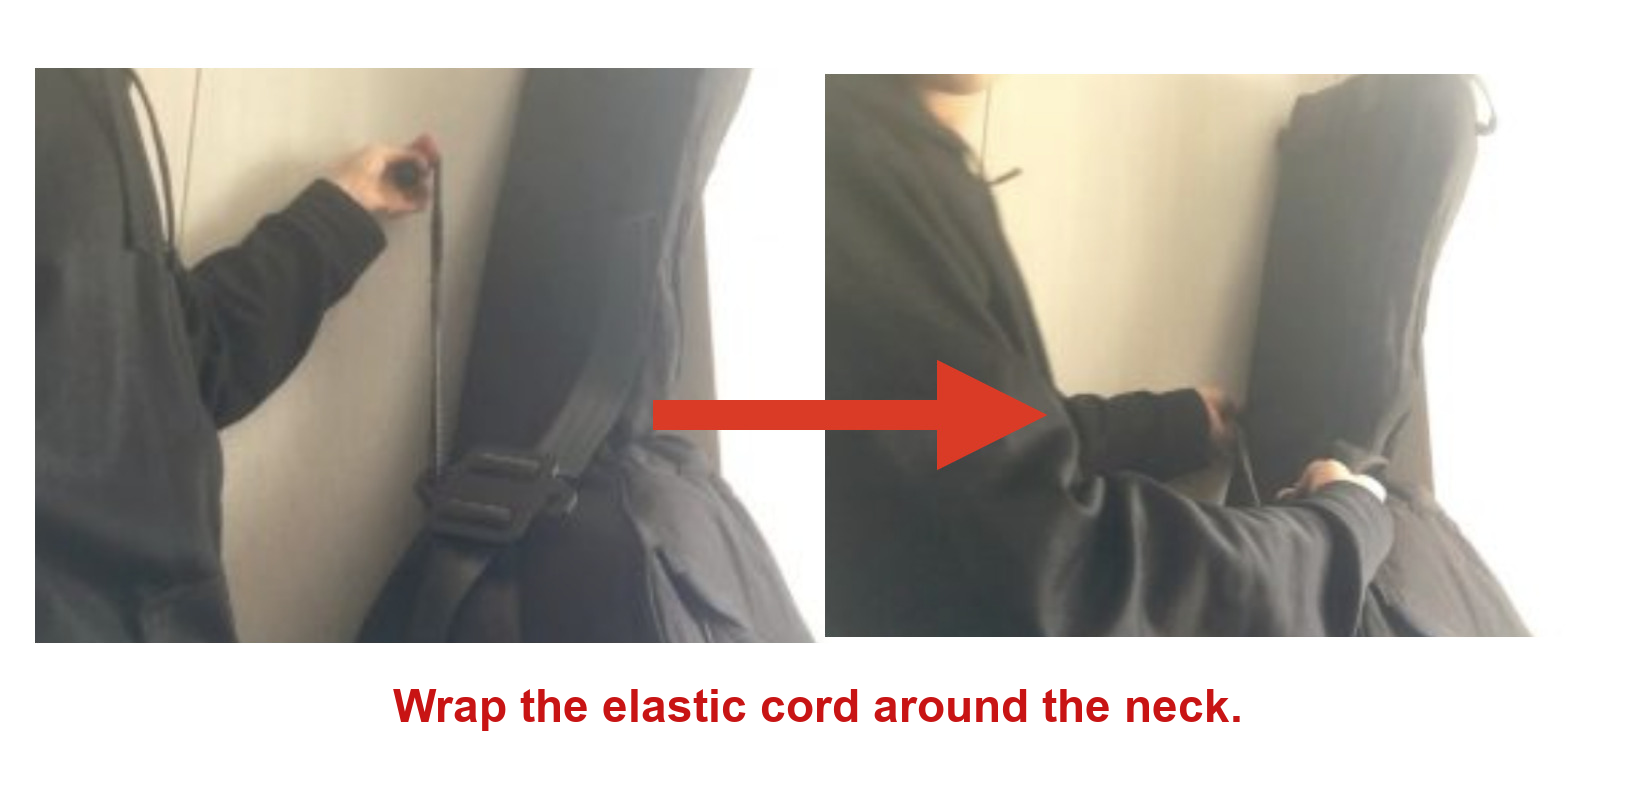
and the strap wraps around the neck of the bass like this.

And that’s it — you’re done.

It really is that simple.

I took it for a walk to try it out.

The wheels don’t rattle much, and they feel sturdy — like they’re properly supporting the weight of a heavy upright bass.

It’s a Bass Buggie-style cart, and similar wheeled attachments for upright bass are available from various retailers if you search for “bass buggy” or “double bass wheels.”

It’s a great item if you want to move your upright bass around without the usual hassle.

Do Cheap Carry Carts Lose Their Wheels?

Before I started using the Bass Buggie, I was using an ordinary carry cart like the one below.

Example image

I was using a cheap one that cost around $15, and one day while I was walking, a wheel popped right off and went rolling away. I guess it just couldn’t handle the weight of the bass.

That was the moment it hit me: it’s not just the instrument itself that needs to be solid — the case and accessories matter too.

If you’re picking up the upright bass for the first time this season, having a good cart is well worth it.

Want Personalized Feedback on Your Playing?

This is exactly the kind of thing that’s hard to fix alone — and where having a teacher makes all the difference.

At Line on Bass, I offer an online lesson service where you send me a video of your playing, and I give you specific, detailed feedback — every single day if you want.

Students from around the world are using this to fix exactly these kinds of issues and steadily improve their jazz bass skills.

Check Out the Lesson Service →

Posted on Leave a comment

Double Bass Case Review: Carlo Giordano BSC-300 and What I Always Carry With It

The double bass case I use is the Carlo Giordano BSC-300.

Here’s a rundown of how it holds up in daily use, plus what I always carry along with it.

The Carlo Giordano BSC-300 Double Bass Case

If you search for “double bass case” or “upright bass gig bag,” this one tends to show up near the top of the results pretty consistently.

It sits in the mid-price range for a padded bass case — not the cheapest option out there, but far from the most expensive either.

Here’s the single biggest pro and the single biggest con, in plain terms:

Incredibly sturdy! (Pro)
Seriously heavy!! (Con)

Let’s go through the details.

The Upside of the BSC-300

It’s Sturdy

The padding inside the case is just thick, period. The area around the bridge and bottom of the bass especially feels solidly held in place, which is reassuring. It also holds up fine in light rain — water doesn’t soak through to the inside.

Plenty of Handles

Going from the head down to the end pin, there are four handles along the front, three on the side, and a shoulder strap with a carabiner clip is also included. Since the case is heavy, having a lot of places to grab it really helps.

Big Pockets

There are two back pockets, one above the other. They’re roomy enough to fit around four A4-sized sheet music binders. There’s also storage up front.

A small pocket near the bottom front fits about the bottom half of a water bottle.

There’s a bow pocket too.

The Downside of the BSC-300

It’s Heavy

Plain and simple, it’s heavy.

In summer, just getting to a gig with it leaves you as drenched in sweat as if you’d already played the set. It’s tough going for a lot of players, frankly.

It’s Bulky

At train station ticket gates, you can only fit through the wider lanes, and for narrower gates you have to turn the case sideways to get through.

How I Transport It

I use a dedicated set of wheels called a bass buggy.

It’s a real investment on its own, and you might balk at paying that much just for a set of wheels. But the cheaper carts sold at general hardware stores tend to be wobbly and break quickly, so in the long run a dedicated bass buggy isn’t actually expensive — it just pays for itself over time.

Tips for Choosing a Double Bass Case

Lightness vs. Durability

The lighter the case, the easier it is to carry, but you give up some durability. The heavier it is, the harder things like stairs become.

If You Use It Often

If you’re hauling your bass around a lot, I’d lean toward durability even if it costs you some weight. You never know what might happen while you’re out and about — it’s a bit like driving: accidents tend to happen right when you’ve let your guard down, often not long after you’ve gotten comfortable with something new.

That said, it really is heavy, so it’s a real tradeoff. (laughs)

Buy In Person If You Can

Same idea as trying out an amp or an instrument before buying — if at all possible, bring your own bass to the shop and actually test how it fits and handles in the case. You can also get advice from the staff on the spot.

Want Personalized Feedback on Your Playing?

This is exactly the kind of thing that’s hard to fix alone — and where having a teacher makes all the difference.

At Line on Bass, I offer an online lesson service where you send me a video of your playing, and I give you specific, detailed feedback — every single day if you want.

Students from around the world are using this to fix exactly these kinds of issues and steadily improve their jazz bass skills.

Check Out the Lesson Service →

Posted on Leave a comment

Why You Should Wear a Strap Even During Solo Bass Practice

This article is written by Toru Hoshino, a jazz bassist and instructor based in Japan who teaches online lessons to students worldwide. In this article, he writes about using a strap on bass.

The content here is exactly what the title says: I wear a strap even during solo practice at home, and I tell my students they should too.

Why You Should Wear a Strap Even During Solo Practice

The reasons to wear a strap even during solo practice include:

✅️ It stops the instrument from wobbling
✅️ It’s easier to play
✅️ It lets you simulate a real performance

…among others.

It Stops the Instrument from Wobbling

Without a strap, the balance is off. And when the balance is off, part of your attention goes toward just keeping the instrument stable.

What you actually want is to focus entirely on playing — but if your attention keeps drifting toward stabilizing the instrument, you can’t fully focus on your playing.

With a strap on, there’s no wobbling, so you’re free to focus on what you’re actually trying to play.

It’s Easier to Play

This is similar to the point above, but playing with a strap on is simply easier than playing without one.

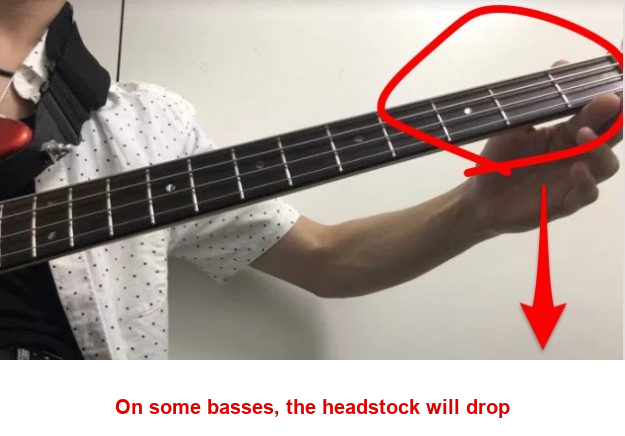
Depending on the instrument, some basses have a heavy headstock and will “neck-dive.”

But even with an instrument heavy enough to neck-dive like that, a properly fitted strap lets you play with the instrument sitting exactly where you want it.

It Lets You Simulate a Real Performance

At an actual gig, you’re usually standing while you play.

If you get used to wearing a strap during practice at home, that same feeling carries over naturally when you’re performing live.

Strap length comes down to personal preference and genre, and there’s no single right answer, but personally, I adjust mine so the bass sits in the same position whether I’m sitting or standing.

Back when I was playing punk rock, I had my strap set long, so I’d practice standing even at home.

The strap is a genuinely important part of the instrument. It’s worth thinking carefully about how you work with yours in order to play your best.

The Strap I’m Currently Using

The one I’m using right now is from a brand called COMFORT.

I wrote up a full review of it here: COMFORT Strap Bass Strap Review: Why Its Memory-Foam Padding Feels So Good

It’s well-built, plush, and genuinely comfortable. If you’re on the fence about which strap to get, give it a try.

I hope this gives you a reason to rethink how you practice — and once your setup feels solid, getting feedback on how it actually translates to your playing is the next step.

Want Personalized Feedback on Your Playing?

This is exactly the kind of thing that’s hard to fix alone — and where having a teacher makes all the difference.

At Line on Bass, I offer an online lesson service where you send me a video of your playing, and I give you specific, detailed feedback — every single day if you want.

Students from around the world are using this to fix exactly these kinds of issues and steadily improve their jazz bass skills.

Check Out the Lesson Service →

Posted on Leave a comment

MuseScore: A Free Notation Tool Worth Using for Bass

This article is written by Toru Hoshino, a jazz bassist and instructor based in Japan who teaches online lessons to students worldwide. In this article, he introduces MuseScore, a free notation program he relies on constantly for writing out bass lines.

About MuseScore

MuseScore is music notation software. You can write out sheet music, generate audio playback, and export your files as PDF, WAV, and various other formats to share with others.

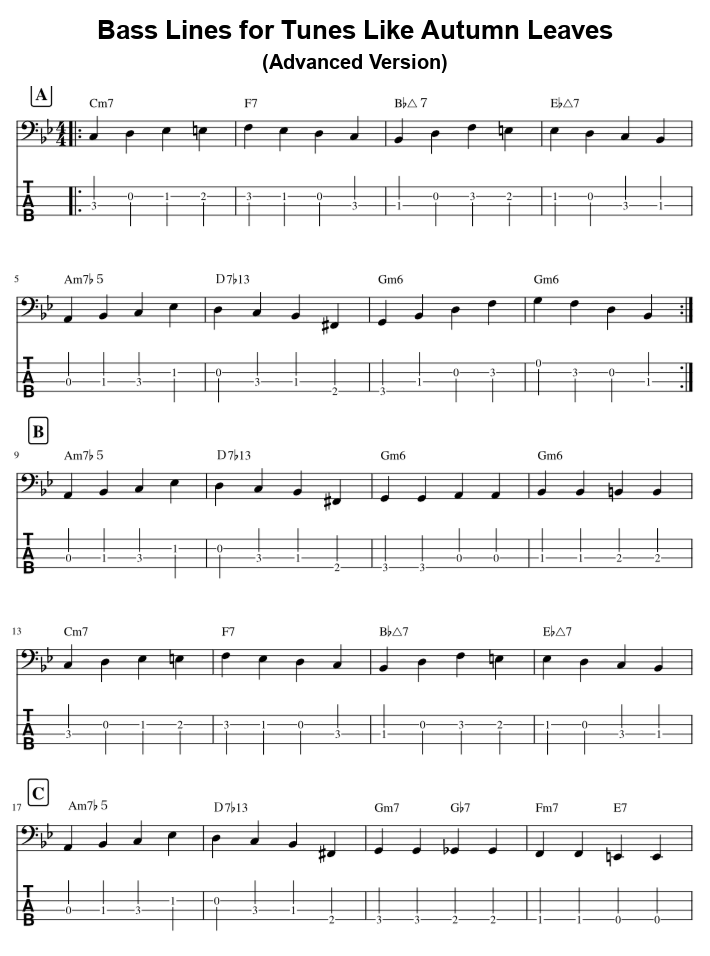
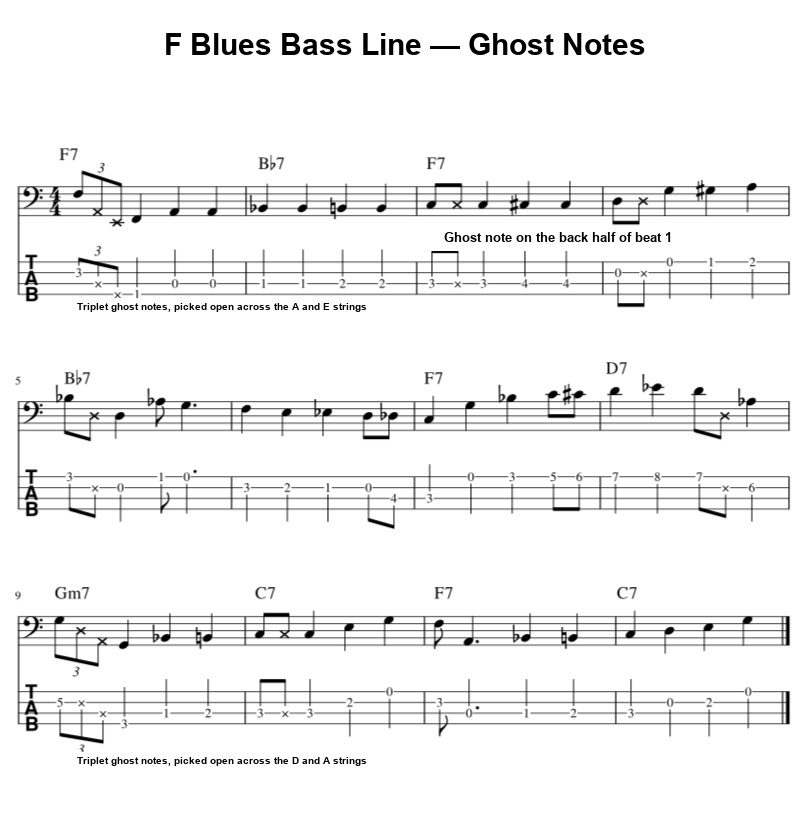
Sheet Music Made With MuseScore

Audio Made With MuseScore

Bass only:

Full ensemble:

Features in MuseScore That Are Especially Useful for Bass

Transposing

You can transpose notes in one click (Notes ▶ Transpose).

Adding Text

You can add titles, or write notes off to the side of the staff.

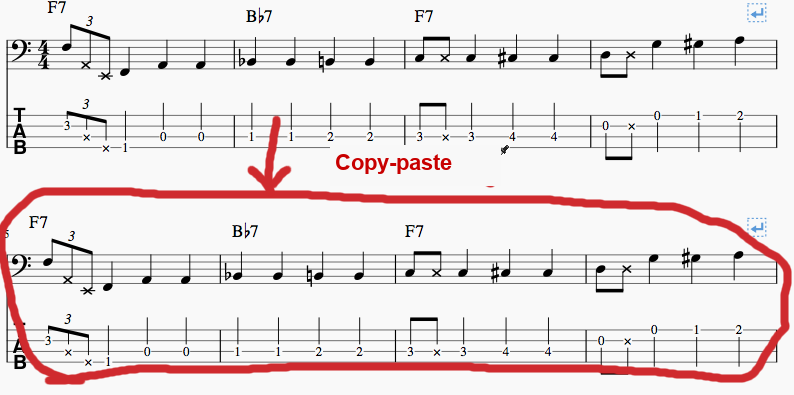
Copying and Pasting Notes

You can copy a passage of notes and paste it into other bars. It’s a huge time-saver — no need to write out the same notes twice.

Writing Linked Tab and Standard Notation

Enter an F, and the tab automatically shows up on the 3rd fret of the D string. Enter a B♭, and it automatically shows up on the 1st fret of the A string.

For both bass and guitar, you can write notation that stays linked to a tab staff automatically.

MuseScore is free to download for both Windows and Mac here:
https://musescore.org/en

It might take a little time to get used to, but you can save your files locally on your computer, and once you’re comfortable with it, it’s incredibly useful. I use it constantly myself.

I hope this is a useful tool to add to your practice routine — and once you’ve got your bass lines written out clearly, getting feedback on how you’re actually playing them is the natural next step.

Want Personalized Feedback on Your Playing?

This is exactly the kind of thing that’s hard to fix alone — and where having a teacher makes all the difference.

At Line on Bass, I offer an online lesson service where you send me a video of your playing, and I give you specific, detailed feedback — every single day if you want.

Students from around the world are using this to fix exactly these kinds of issues and steadily improve their jazz bass skills.

Check Out the Lesson Service →