This article is written by Toru Hoshino, a jazz bassist and instructor based in Japan who teaches online lessons to students worldwide. In this article, he lays out nine concrete steps for building walking bass lines on your own, even if you’ve never improvised before.
This is for anyone who wants to play walking bass but isn’t sure where to even start.
This comes up constantly in trial lessons: plenty of bassists can play anything written out in standard notation or tab, but freeze up the moment they’re asked to improvise over a chord chart.
The 9 steps below are what I recommend to exactly those students.
If you’re teaching yourself walking bass, working through these steps in order is far more effective than just grinding through scale practice at random.
Follow them in sequence, and you can build a solid feel for walking bass from the ground up — even entirely self-taught. Get through step 6 alone, and with just 20–30 minutes of daily practice, you’ll be able to put together a line that sounds “right” over pretty much any tune or progression.
Here are the 9 steps.
Contents
9 Steps to Playing Walking Bass Improvisationally
1. Map Out the Notes on the Fretboard
Start by making sure you can instantly name the notes on the fretboard, at least within the first 5 frets. If this part is shaky, no amount of theory will translate into actual notes. It’s worth nailing down first.

The chart above maps out the natural and sharp/flat note names across the strings within the first few frets.
2. Pick a Chord Progression to Practice With
Choose one chord progression to use for practice. Here, we’ll use a B♭ blues progression as our example.

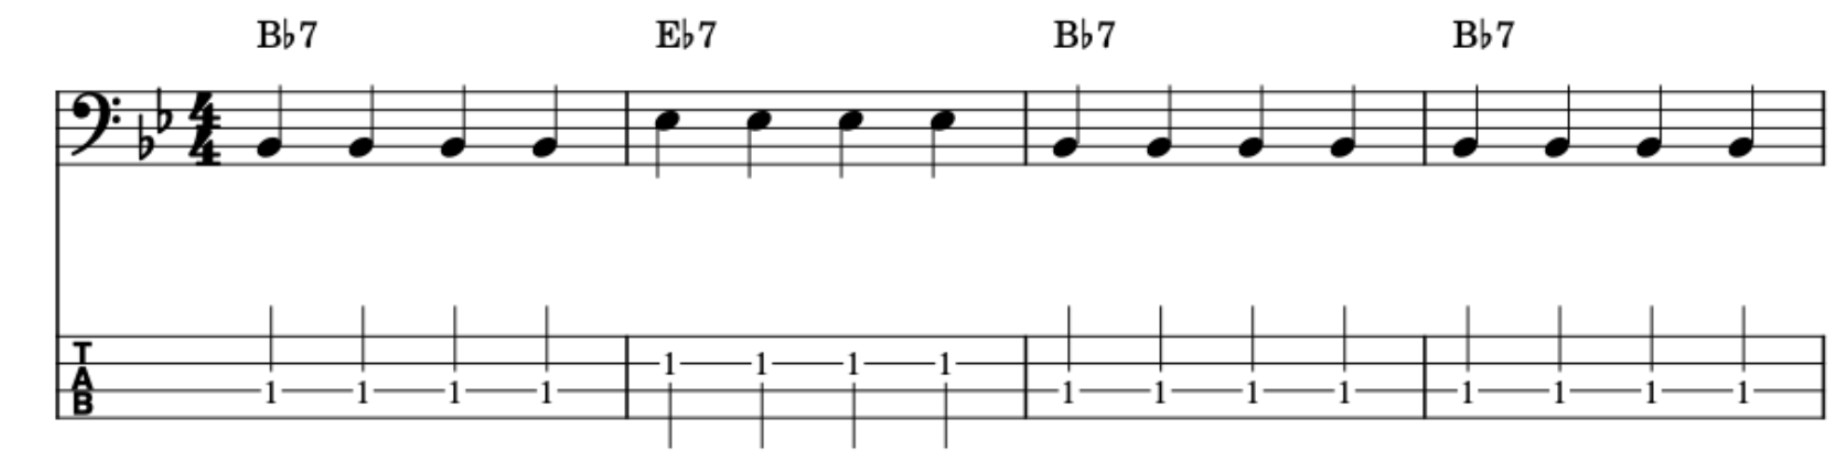
3. Play the Root on Quarter Notes
Start by playing just the root note in a steady quarter-note rhythm. Keeping every note’s length and volume even is the key skill here.
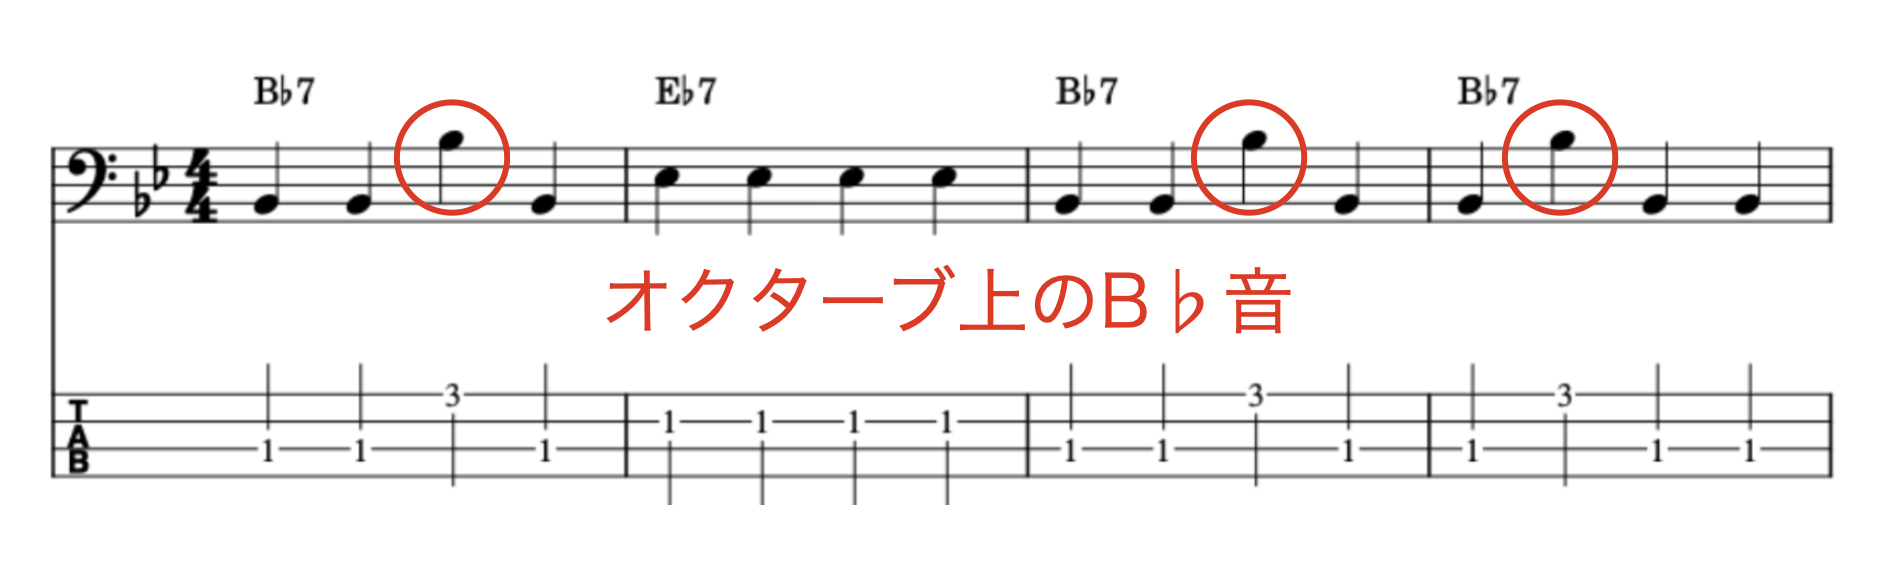
4. Add the Octave to the Root
Once the root alone feels comfortable, add the octave. This brings some up-and-down motion into the line and starts giving it a bit more shape.
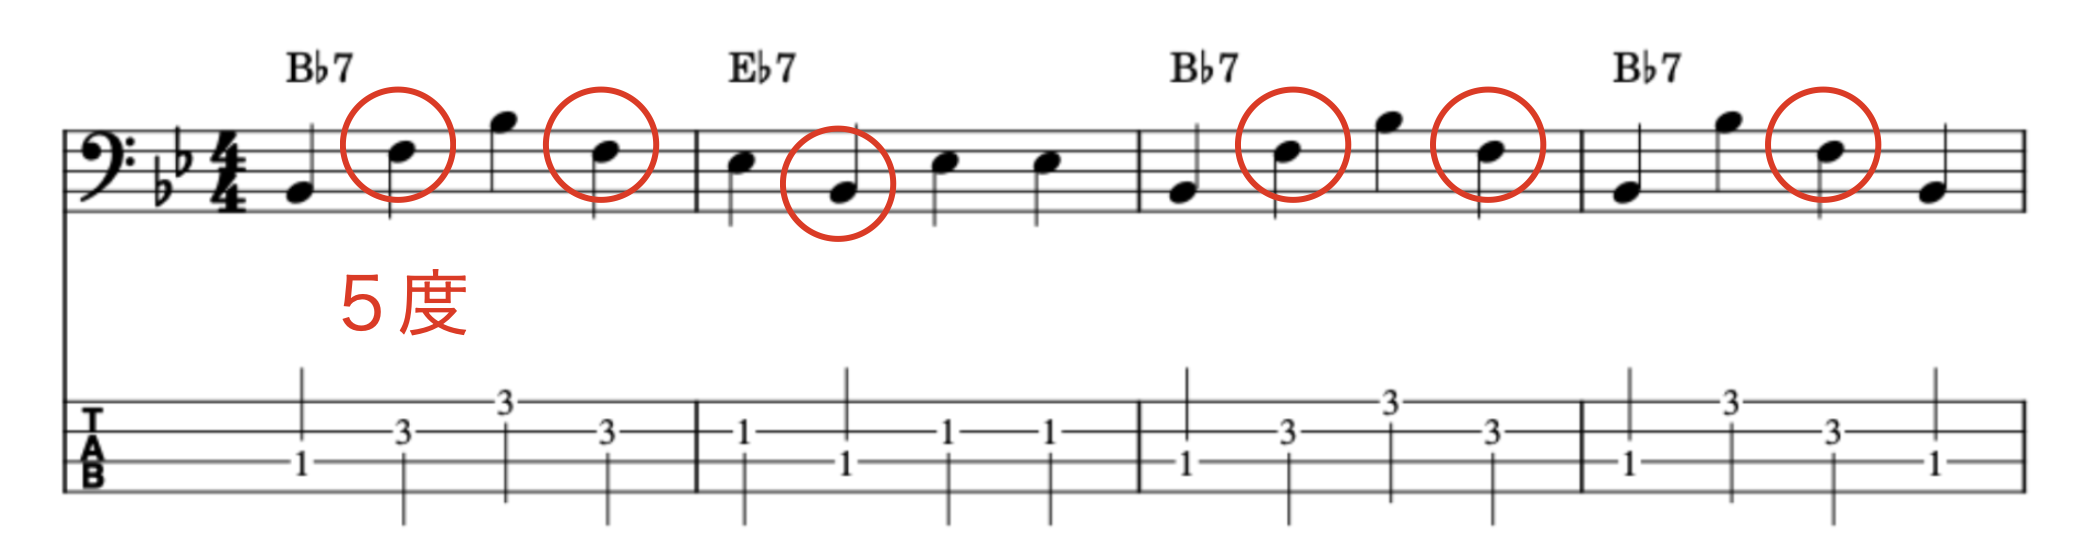
5. Add the 5th Between the Root and Octave
Now bring in the 5th. Adding it between the root and the octave thickens up the sound and gives the line more bounce.
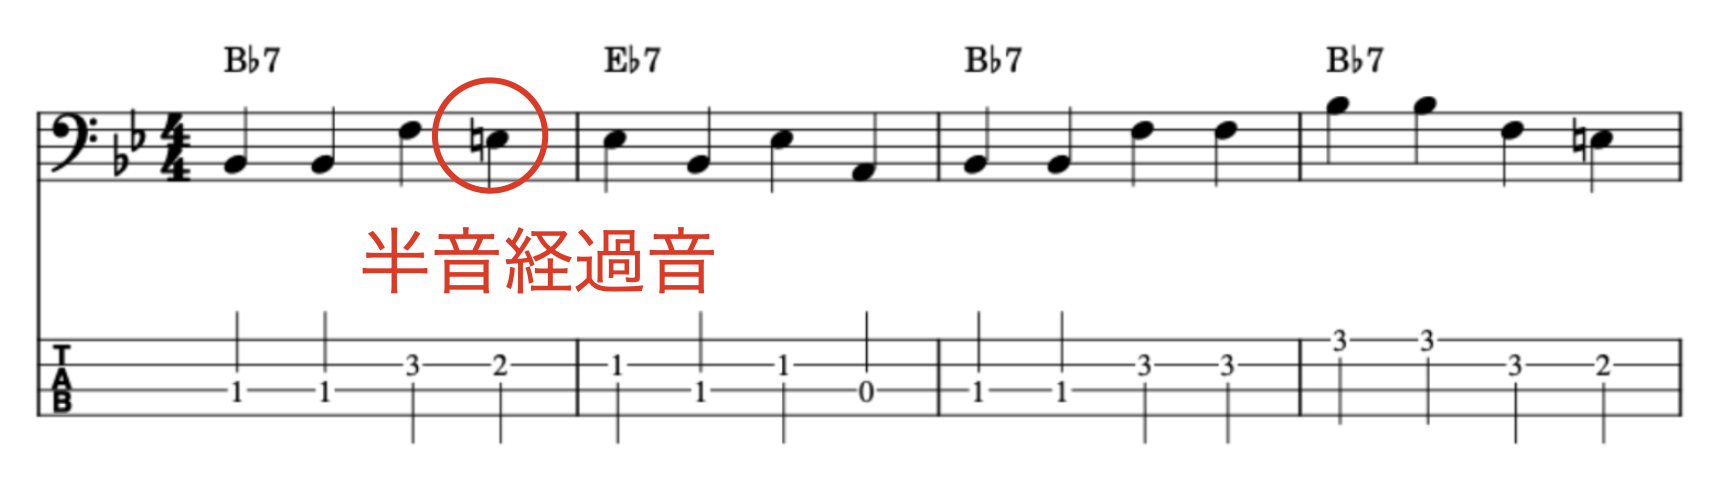
6. Add Chromatic Passing Tones
Adding a chromatic passing tone smooths out the connections between notes and starts giving the line a more genuinely jazz-like flow. Once you can do this comfortably, it should already be starting to sound noticeably more like jazz.
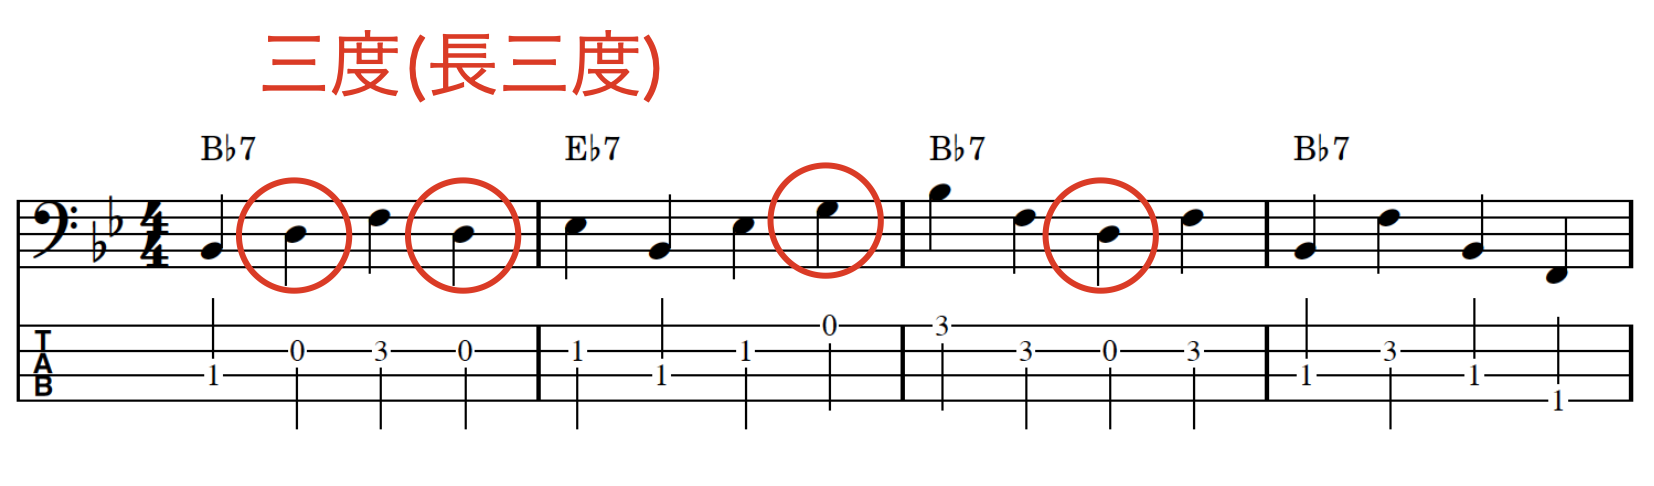
7. Add the 3rd
Adding the 3rd makes the chord quality much clearer and sharpens the overall outline of the harmony. It’s an essential note for actually expressing the chord.
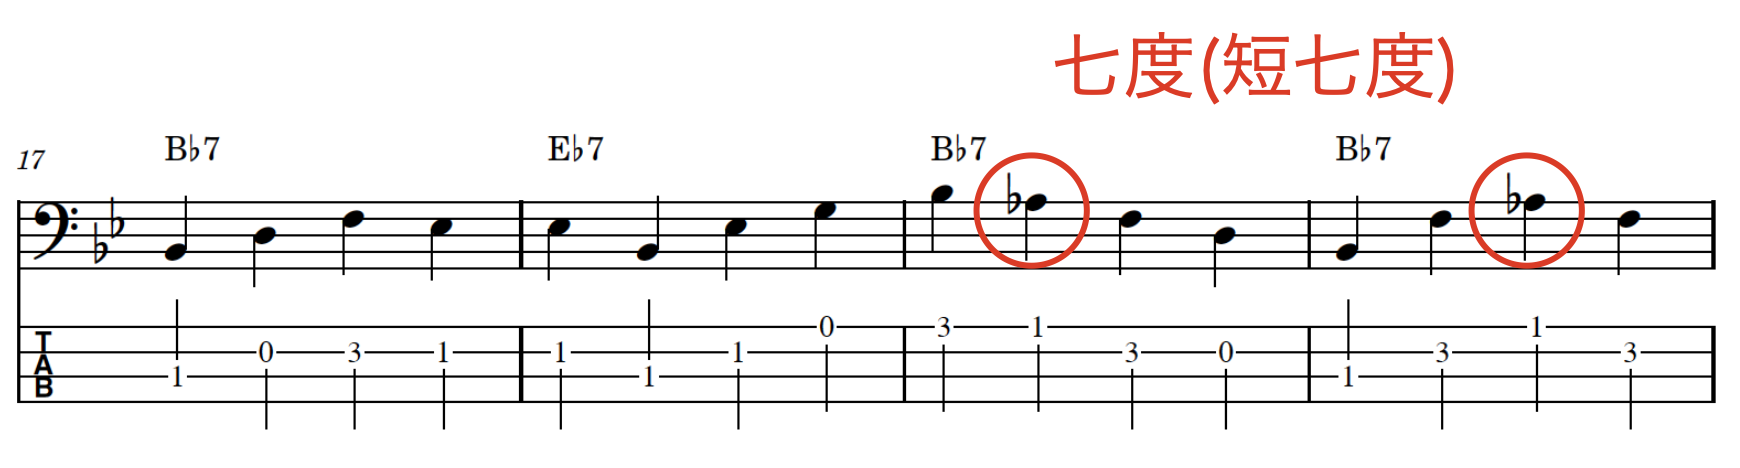
8. Add the 7th
Adding the 7th on top instantly deepens the jazz flavor of the line — it’s the finishing touch for a more polished, sophisticated sound.
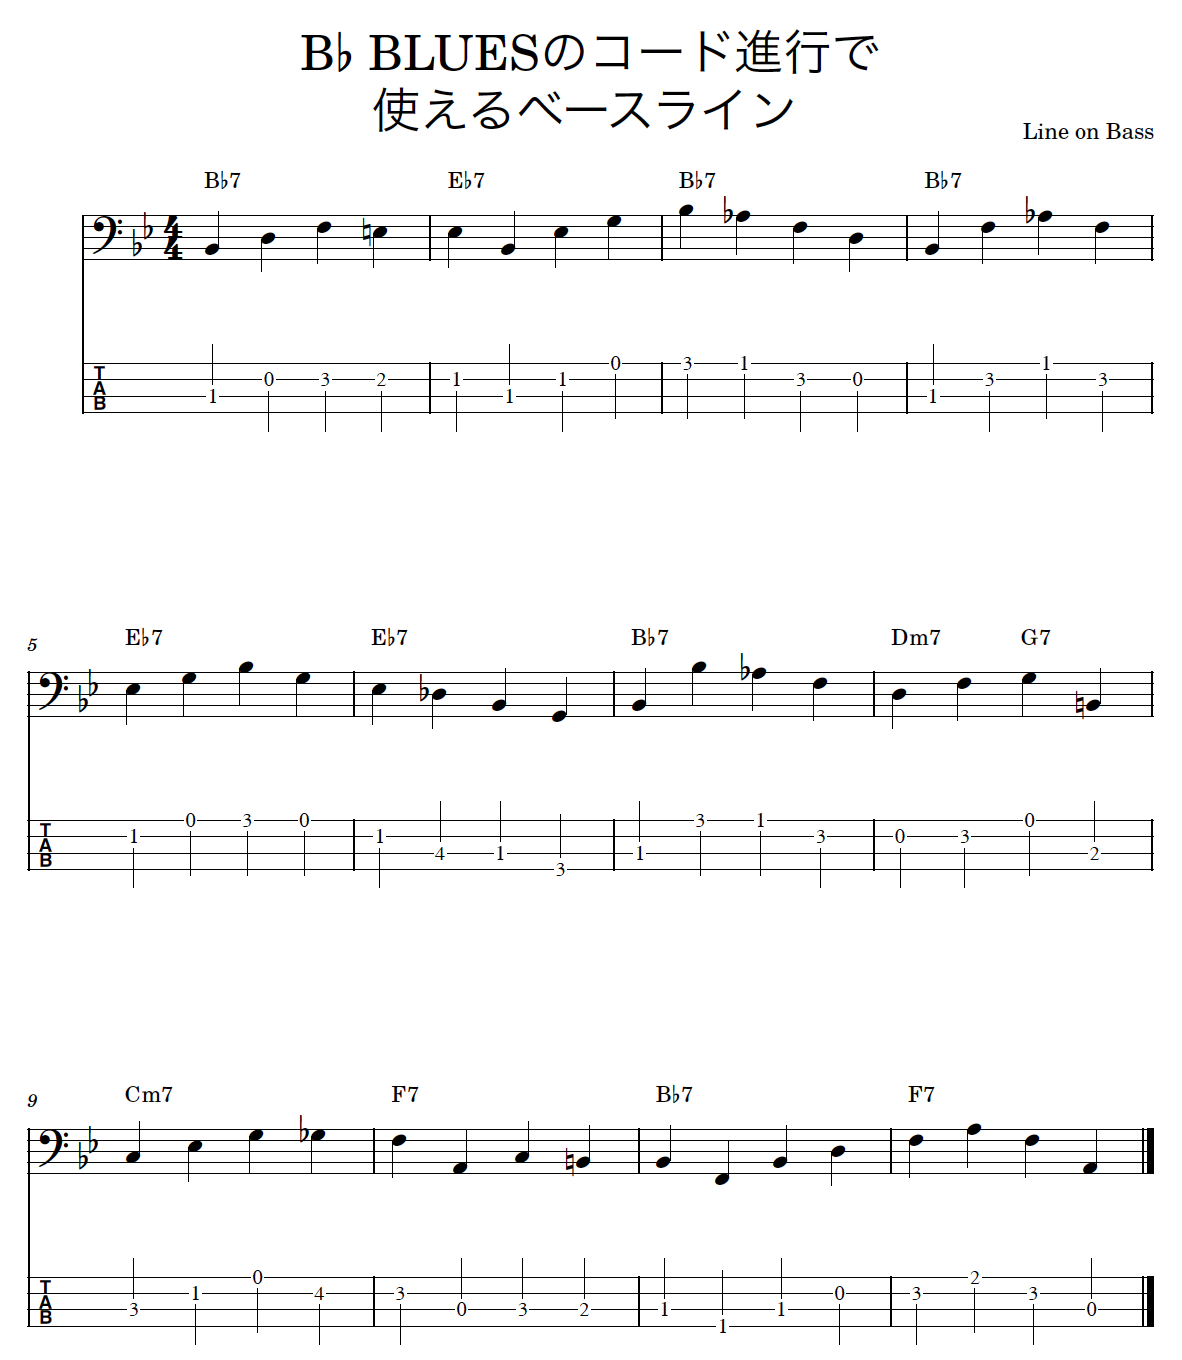
Here’s what a full 12-bar bass line looks like once the 7th is incorporated:
9. Practice With Real Tunes
Finally, try this out on actual songs.
Tenor Madness
Blue Monk
Blues By Five
Trane’s Blues
All of these are B♭ blues tunes. Try playing along with the recordings, or practice with backing tracks using an app like iReal Pro.
Wrapping Up
You don’t need to jump straight into advanced theory or complicated phrases to play walking bass.
Understanding the fretboard, knowing your chord tones, and adding notes one degree at a time — in that order — is enough for anyone to start building improvised lines.
Don’t just memorize the patterns. Once you understand what each note is actually doing, the music gets genuinely more enjoyable. I hope this gives you something useful for your daily practice.
Working through all nine of these steps on your own is absolutely possible — but it’s also exactly the kind of process where a second pair of ears can catch small issues early and save you a lot of trial and error.
Want Personalized Feedback on Your Playing?
This is exactly the kind of thing that’s hard to fix alone — and where having a teacher makes all the difference.
At Line on Bass, I offer an online lesson service where you send me a video of your playing, and I give you specific, detailed feedback — every single day if you want.
Students from around the world are using this to fix exactly these kinds of issues and steadily improve their jazz bass skills.