Posted on Leave a comment

Can’t Practice Upright Bass at Home? An Electric Upright Might Be the Answer

This article is written by Toru Hoshino, a jazz bassist and instructor based in Japan who teaches online lessons to students worldwide. In this article, he answers a question he gets constantly: can an electric upright bass actually substitute for upright bass practice?

“I’d love to play upright bass, but I can’t commit to buying one because of noise concerns where I live. So I’m considering an electric upright bass for home practice instead — but how different does it actually feel from a real upright? Does practicing on an electric upright really count as upright bass practice?”

This is a question I get all the time.

Right off the bat: they’re genuinely different instruments, so yes, the feel is different.
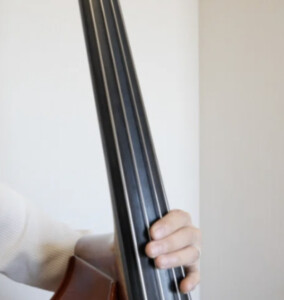
An electric upright bass

That said, your environment isn’t something you can just change overnight. So personally, I think starting with an electric upright bass is perfectly fine.

Here’s why: on upright-style instruments — both electric upright and full-size upright — there are no frets marking off the pitches under your left hand, so you can absolutely use one to build your sense of left-hand positioning, intonation, and how far apart your fingers need to stretch. You can also get a feel for playing standing up and how your right hand strikes the strings.

The big difference is that an upright bass has a large, boxy body.
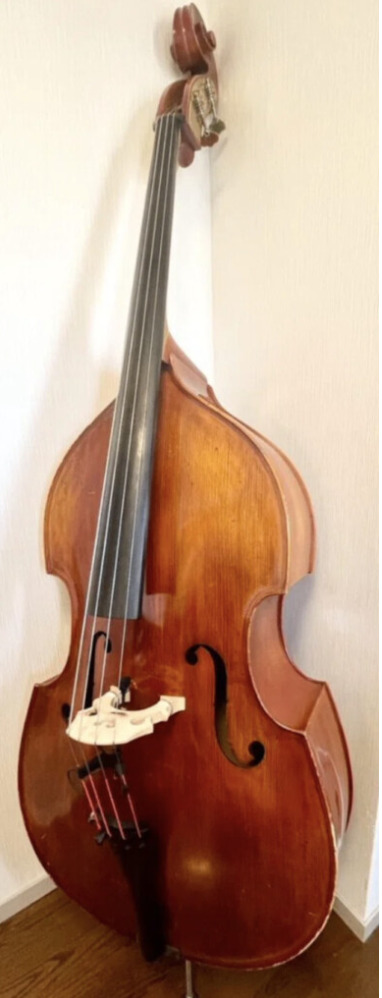
An upright bass with its large body, compared to an electric upright

An electric upright doesn’t have that large boxy body, so the sensation of that resonating body — and the way the instrument actually vibrates as a result — is genuinely different between the two.

I didn’t start out by buying a real upright bass myself, either. I used an electric upright for a long time at the start.

My honest mindset going in was more like, “I want to try upright bass, but there’s no way I can handle something that huge.” I never expected to stick with it for this long, but my thinking is: start with whatever instrument lets you practice comfortably at home — including whether you’ll actually stick with it long-term — get a feel for things gradually, and once you’re genuinely committed, sort out your space and move up to a real upright bass.

Of course, some people will say, “just start on a real upright bass from day one — an electric upright won’t actually help you practice.” That’s a fair opinion too, so take mine as just one perspective among others. 🙂

Deciding which instrument and setup actually fits your situation is exactly the kind of judgment call a teacher can help you make with confidence.

Want Personalized Feedback on Your Playing?

This is exactly the kind of thing that’s hard to fix alone — and where having a teacher makes all the difference.

At Line on Bass, I offer an online lesson service where you send me a video of your playing, and I give you specific, detailed feedback — every single day if you want.

Students from around the world are using this to fix exactly these kinds of issues and steadily improve their jazz bass skills.
Check Out the Lesson Service →

Posted on Leave a comment

5 Common Questions From My Upright Bass Students, Answered

This article is written by Toru Hoshino, a jazz bassist and instructor based in Japan who teaches online lessons to students worldwide. In this article, he answers five questions he gets constantly from upright bass students.

  • Where does the left thumb go?
  • Is it okay to put position marker stickers on the fingerboard?
  • How high should the end pin be?
  • Is it okay to wrap a band around your middle and ring fingers?
  • Does the ring finger actually press the string?

Here are my answers to each — hopefully useful if you’re teaching yourself upright bass and feel like you’ve plateaued.

1. Where Does the Left Thumb Go?

In a half-position setup (the lower-pitched position), the left thumb sits roughly between the middle and index fingers.

Left thumb placement on the back of the upright bass fingerboard

Rest it lightly around the middle of the back of the neck, and use that as the anchor point for moving your whole hand. Be careful that the thumb doesn’t drift too far toward the index-finger side — if it does, it becomes harder to transfer force through the rest of your fingers.

2. Is It Okay to Put Position Marker Stickers on the Fingerboard?

This comes up a lot from beginners who are struggling with intonation — “can I put marker stickers on the fingerboard?”

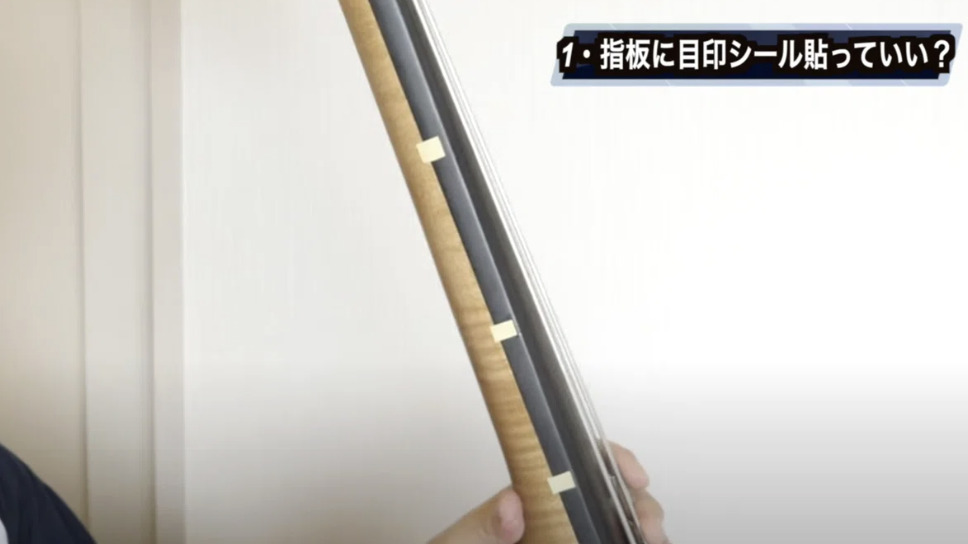
The answer is yes, that’s fine. I did this myself, and some method books even say “use position markers while you’re still getting used to it.”

Position marker stickers placed on an upright bass fingerboard

Just be careful of the following:

  • Don’t damage the fingerboard with a cutter or blade when applying them.
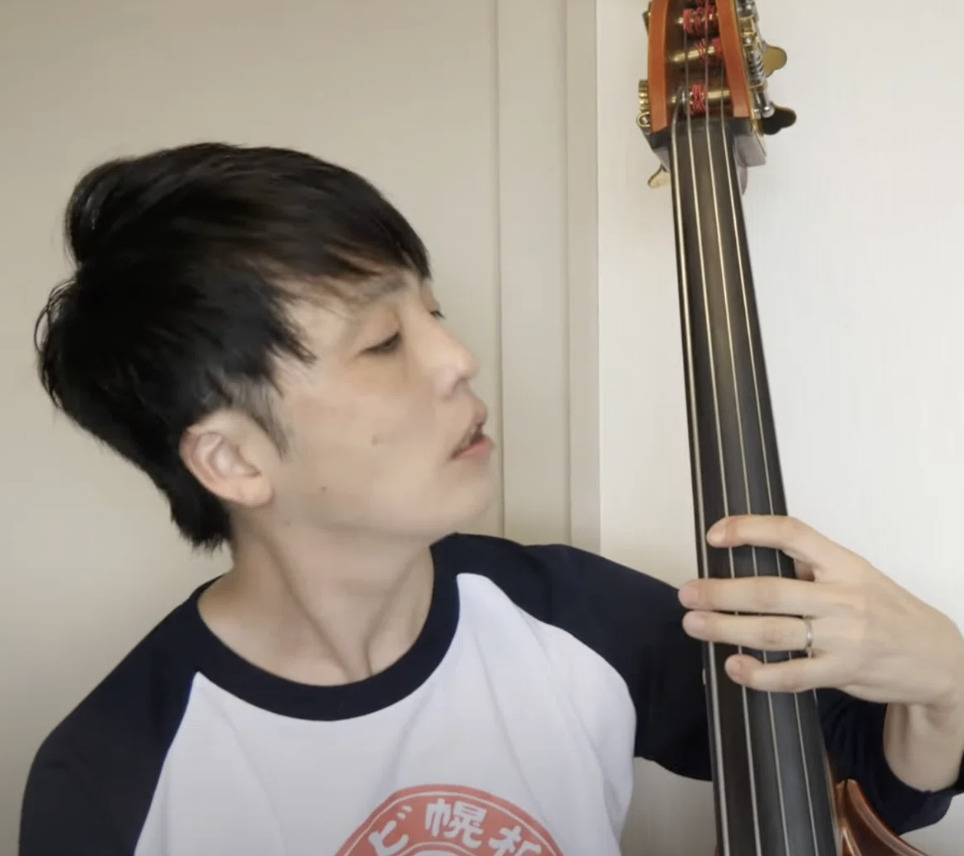
  • Don’t end up craning your neck at an extreme angle to peek at the stickers.

An exaggerated posture of leaning over to look at fingerboard stickers, which should be avoided

↑ This is leaning in way too far to check the stickers.

3. How High Should the End Pin Be?

End pin height varies a lot from person to person depending on height.

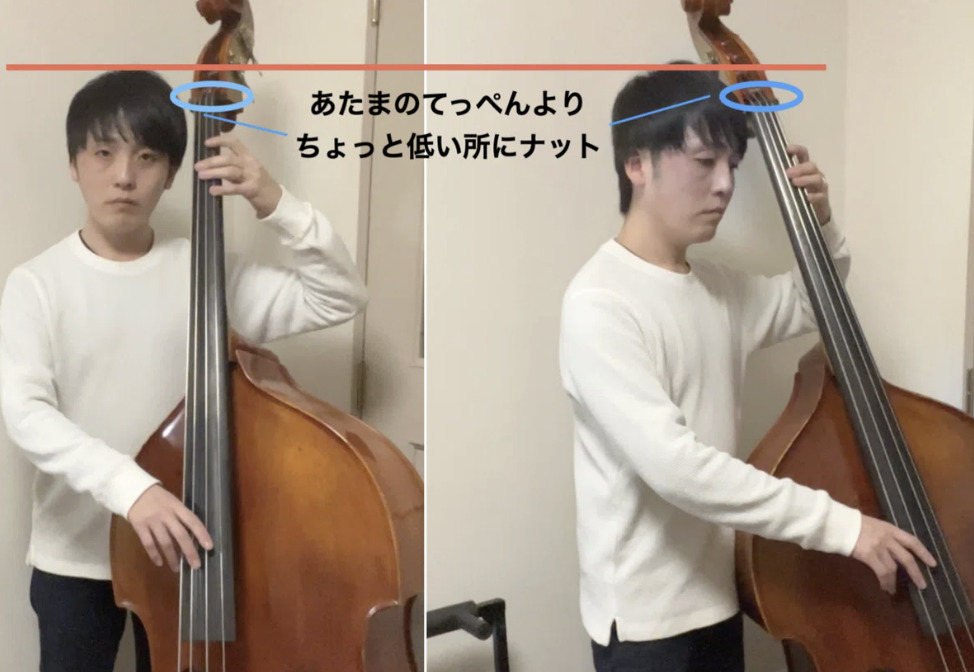
In my case — I’m 5’3″ (161cm) — I run the end pin fully retracted, and I also wear shoes with a bit of a thicker sole to adjust further.

A demonstration of end pin height adjustment on an upright bass

From there, a good general target is having the nut (the part supporting the strings at the top) sit roughly at forehead height.

4. Is It Okay to Wrap a Band Around Your Middle and Ring Fingers?

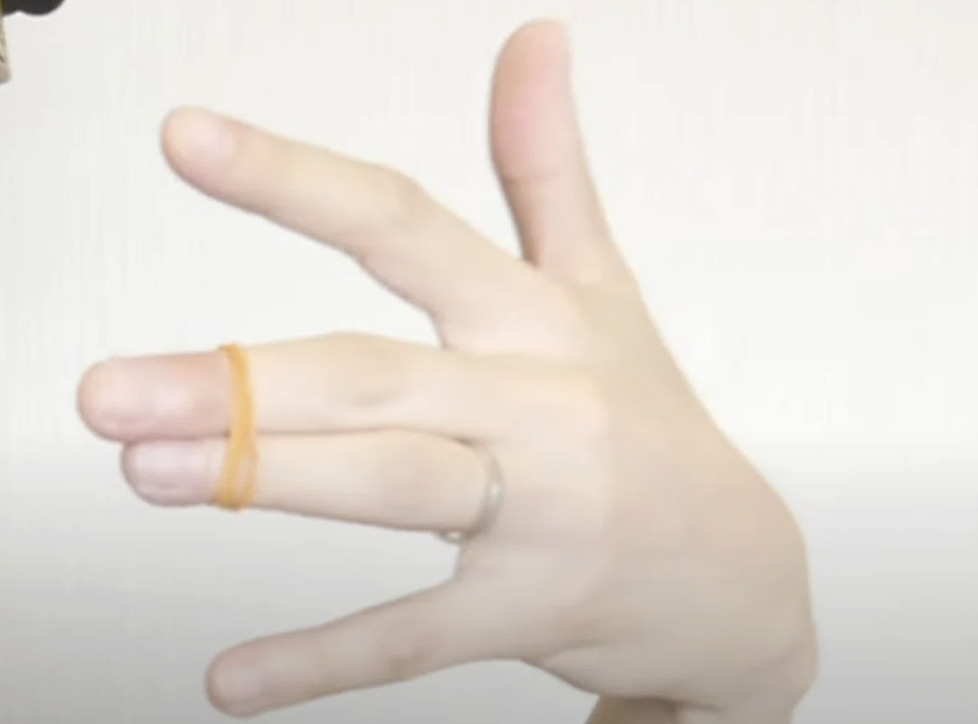
If your middle and ring finger tend to drift apart, a lot of people ask whether it’s okay to practice with a rubber band wrapped around them like this.

A rubber band wrapped around the middle and ring fingers to help keep them together

I never used one myself, but I’ve had students try it, and it didn’t seem to cause any bad habits in particular.

That said, it’s completely natural for your middle and ring finger to drift apart early on. Just keeping the conscious intention of “don’t let them drift too far apart” is usually enough on its own.

Holding onto that awareness during practice makes a noticeable difference in your stability a few months down the line.

5. Does the Ring Finger Actually Press the String?

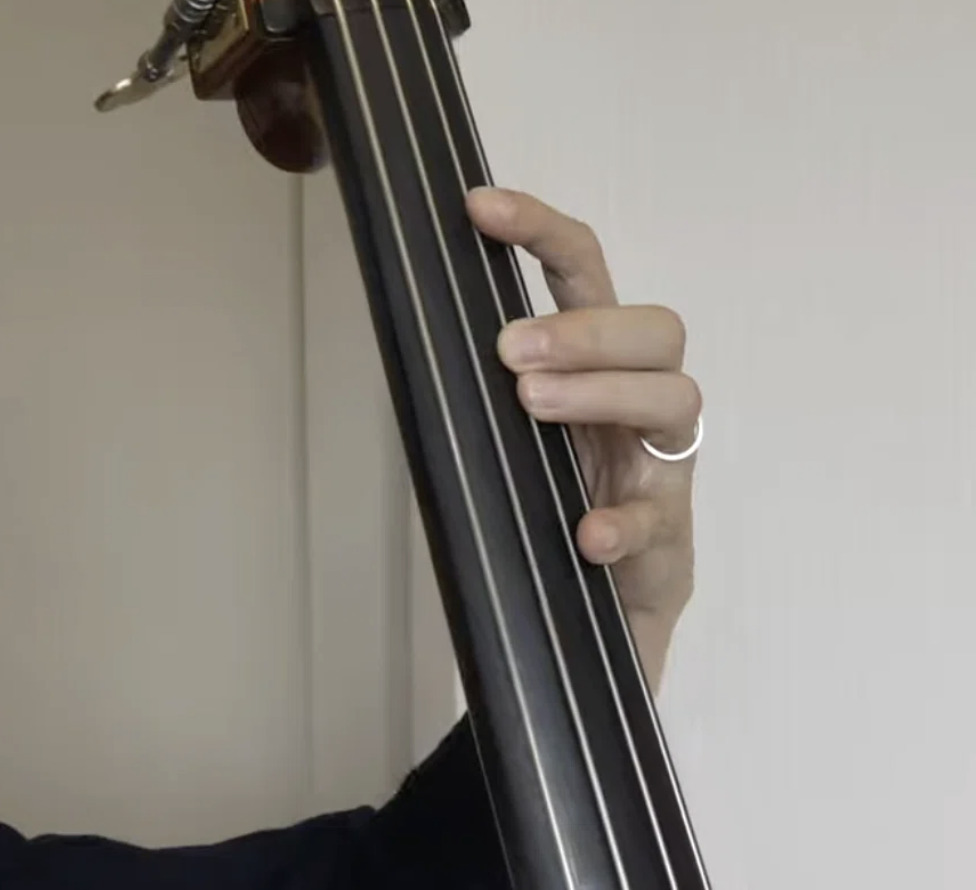
For example, when your middle finger is fretting the E note on the D string, should your ring finger be pressing down too?

The answer is: no, the ring finger doesn’t press the string. Just rest it alongside the middle finger, while the middle finger does the actual pressing.

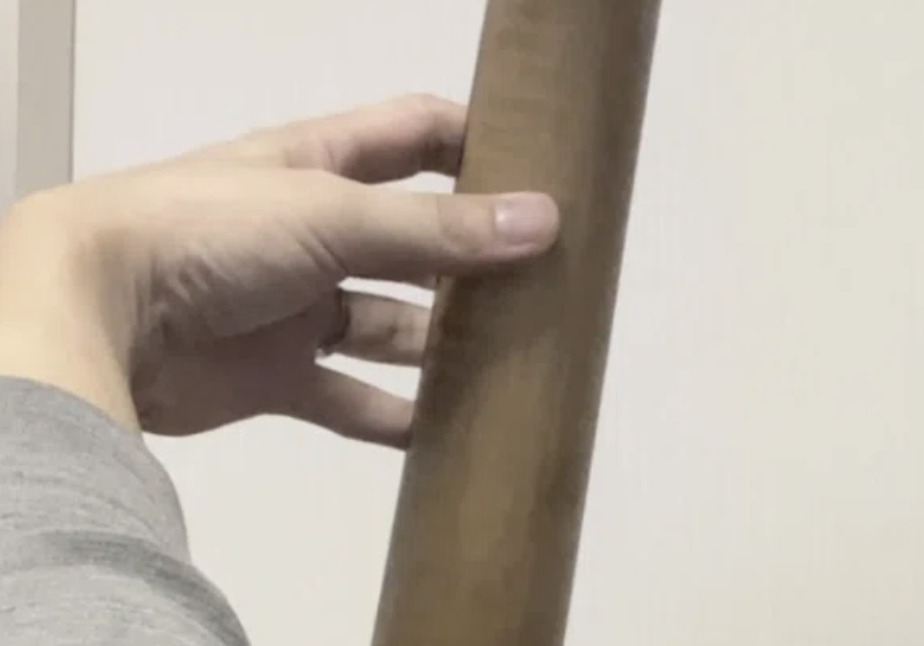
The ring finger resting alongside the middle finger without pressing the string

These are exactly the kinds of small form details that are nearly impossible to catch on your own — and exactly where a teacher reviewing your playing makes the biggest difference.

Want Personalized Feedback on Your Playing?

This is exactly the kind of thing that’s hard to fix alone — and where having a teacher makes all the difference.

At Line on Bass, I offer an online lesson service where you send me a video of your playing, and I give you specific, detailed feedback — every single day if you want.

Students from around the world are using this to fix exactly these kinds of issues and steadily improve their jazz bass skills.
Check Out the Lesson Service →

Posted on Leave a comment

Five Things I Do Differently When Carrying My Upright Bass on the Train in Tokyo

This article is written by Toru Hoshino, a jazz bassist and instructor based in Japan who teaches online lessons to students worldwide. In this article, he shares the habits he relies on for carrying an upright bass around a big city by train.

A question came up recently in my online community from someone living outside of a major city:

“How do you actually move a double bass around when you’re getting around a big city?”

I live in Tokyo and mostly get around by train, and thinking about it, there’s actually quite a bit I pay attention to. Here are the five things I consider most important.

5 Things I Do When Moving Around the City With an Upright Bass

1. A Dedicated Wheel Cart Is Non-Negotiable

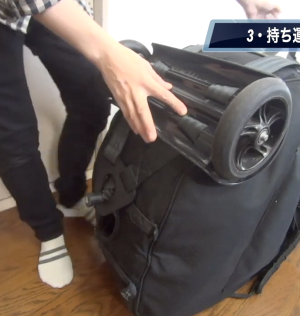
Carrying an upright bass on just the case strap alone is brutal. I use a dedicated wheel attachment, sometimes called a “bass buggy.”

A wheeled cart attachment for carrying an upright bass case

It’s a bit of an investment, but the wheels are very sturdy — if you’re doing a lot of walking, this is essential.

2. Always Take the Elevator

Carrying an upright bass up and down stairs is genuinely rough, so I always use the elevator at any station that has one.

An elevator at a Tokyo train station

3. Pick the Wider Ticket Gate

If the gate is narrow, the wheels can clip the edges, so I always go through the wider gate.

A narrow ticket gate at a train station that is easy to clip with a wheeled case

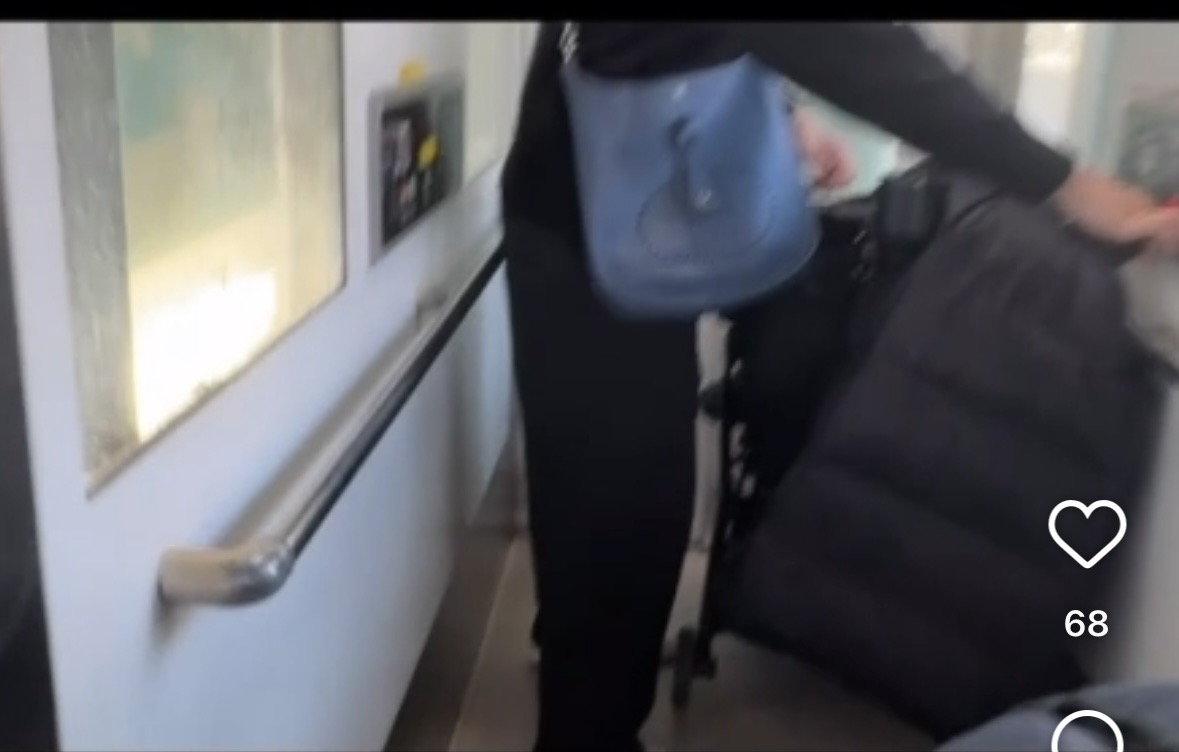
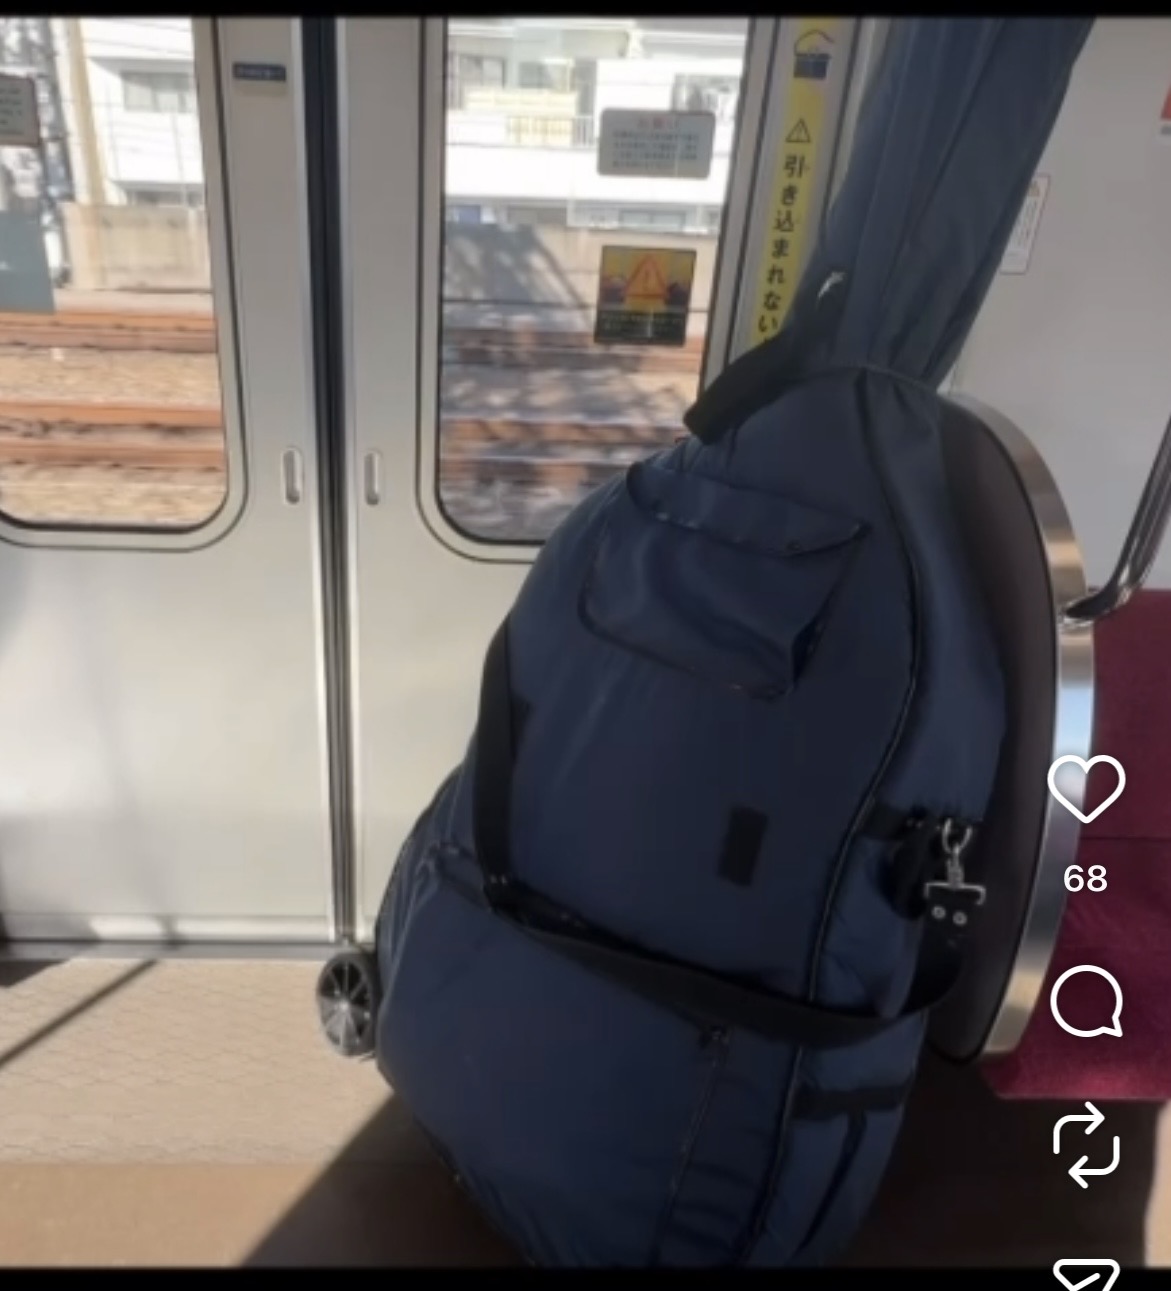
4. Stand in the Corner Near the Doors

On the train, I aim for the corner spot next to the seats near the doors. Even if the train isn’t crowded, I generally stay standing rather than sitting.

Standing in the corner near the train doors with an upright bass case

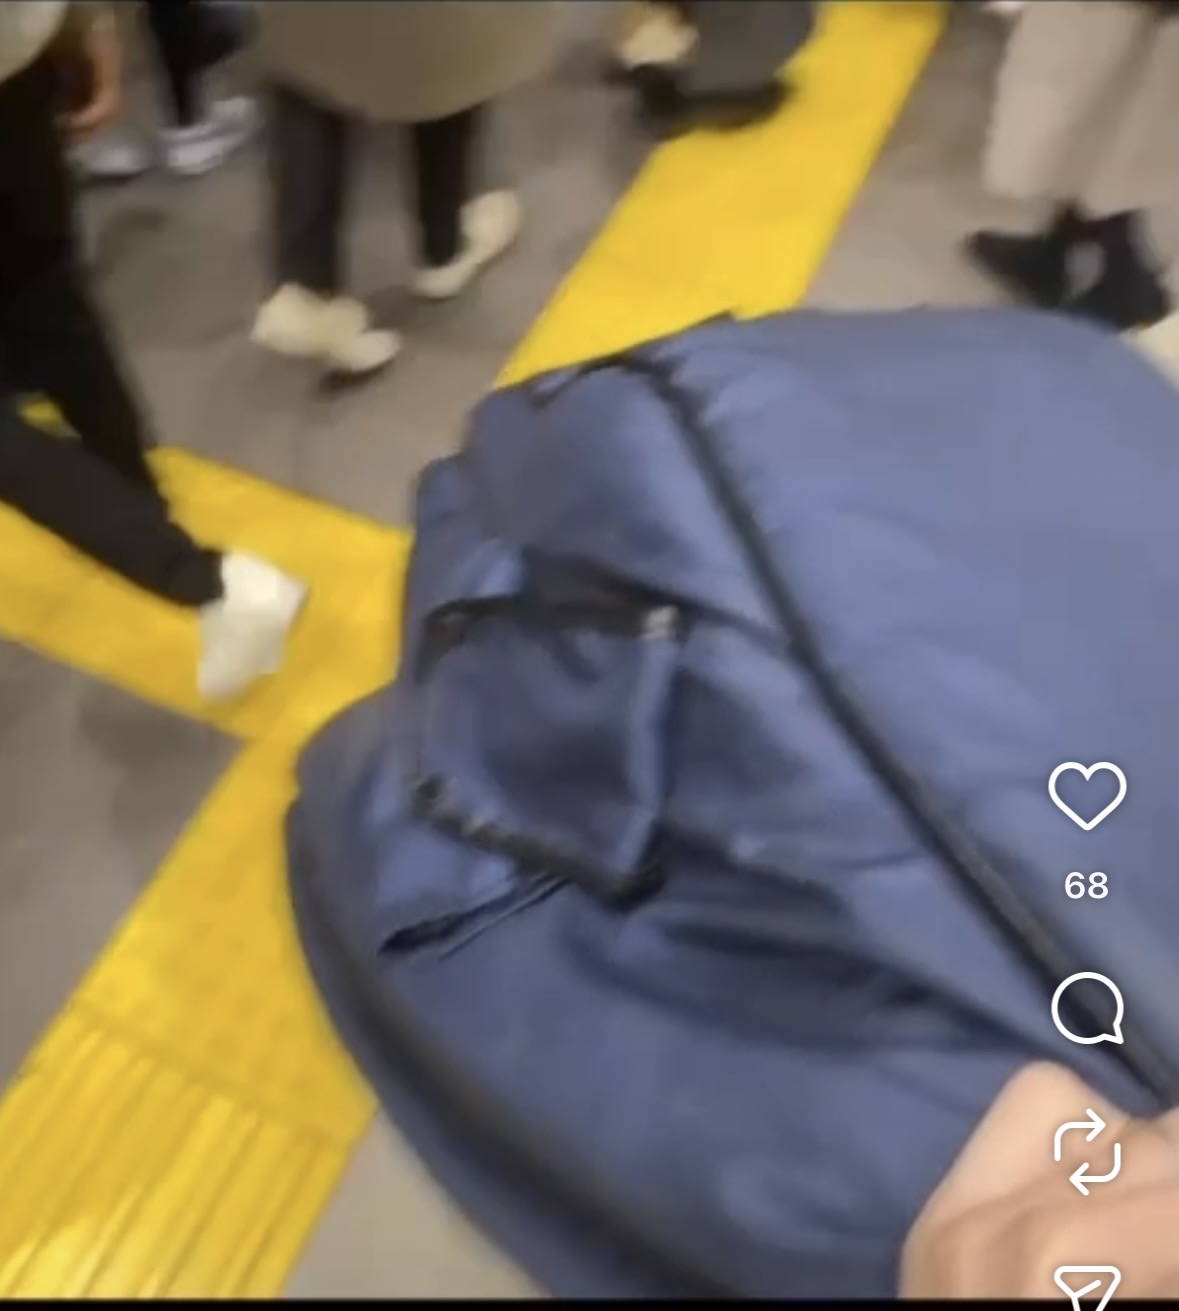
5. Avoid Crowds and Rush Hour

I try to travel at times when it’s not too crowded whenever I can.

Navigating a train platform with an upright bass case, avoiding rush hour crowds

Hauling an upright bass through a city is hard enough on its own — having a teacher who can see your actual playing despite the logistics is exactly where Line on Bass comes in.

Want Personalized Feedback on Your Playing?

This is exactly the kind of thing that’s hard to fix alone — and where having a teacher makes all the difference.

At Line on Bass, I offer an online lesson service where you send me a video of your playing, and I give you specific, detailed feedback — every single day if you want.

Students from around the world are using this to fix exactly these kinds of issues and steadily improve their jazz bass skills.
Check Out the Lesson Service →

Posted on Leave a comment

High-Position Practice Patterns for Upright Bass (With Backing Tracks)

This article is written by Toru Hoshino, a jazz bassist and instructor based in Japan who teaches online lessons to students worldwide. In this article, he shares a few high-position practice patterns for upright bass, along with backing tracks you can practice against.

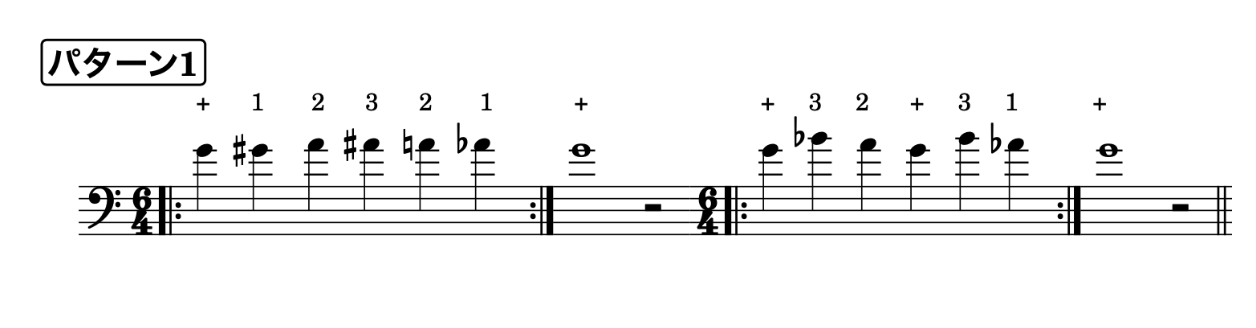
High-Position Pattern 1

High-position practice pattern 1 with fingering numbers

Here’s a backing track you can practice along with:

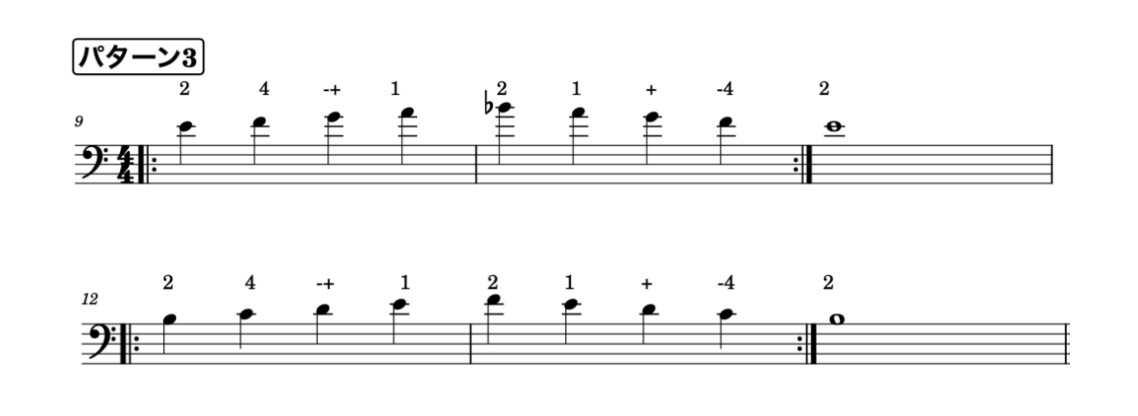
High-Position Pattern 3

Performance Demo (Upright Bass)

High-position practice pattern 3 with fingering numbers

Backing track:

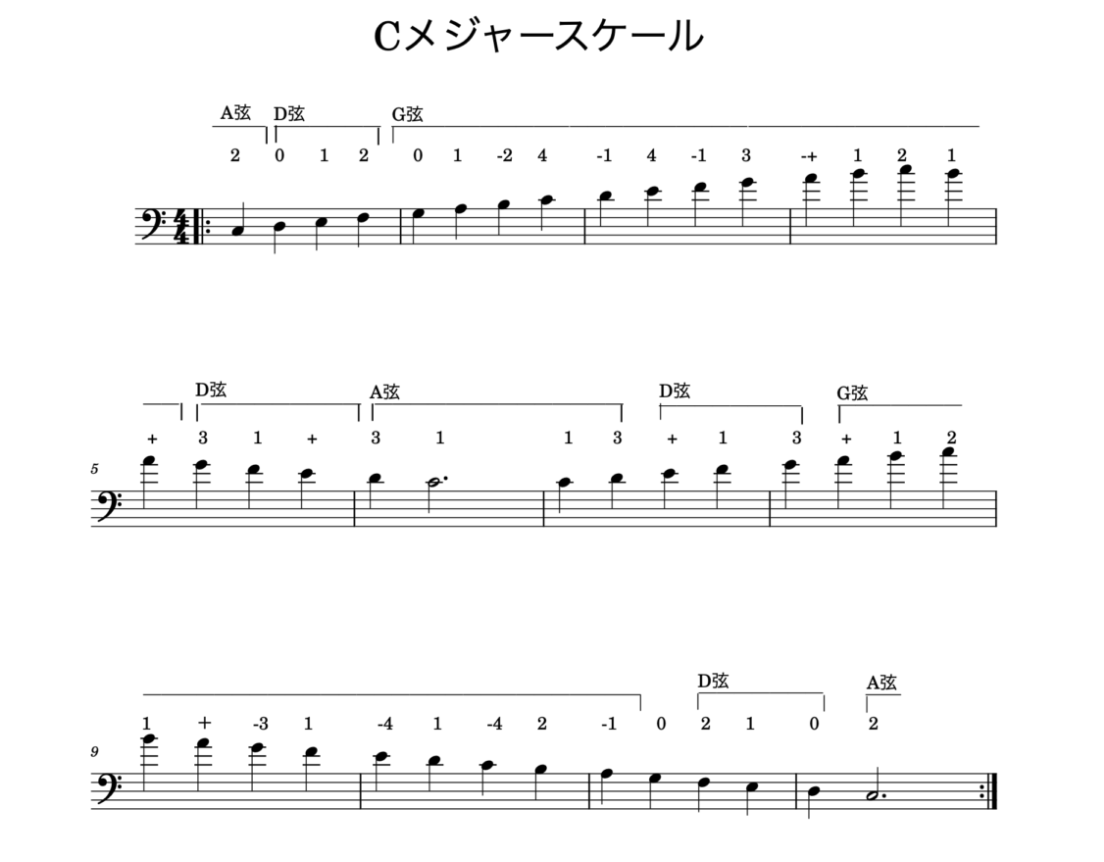
C Major Scale

Performance Demo (Upright Bass)

C major scale across three octaves with string names and fingering

Backing track:

Working through high-position patterns like these is exactly the kind of practice where a teacher’s feedback on intonation makes the biggest difference — it’s hard to hear your own pitch issues up there.

Want Personalized Feedback on Your Playing?

This is exactly the kind of thing that’s hard to fix alone — and where having a teacher makes all the difference.

At Line on Bass, I offer an online lesson service where you send me a video of your playing, and I give you specific, detailed feedback — every single day if you want.

Students from around the world are using this to fix exactly these kinds of issues and steadily improve their jazz bass skills.
Check Out the Lesson Service →

Posted on Leave a comment

Why Listening Closely Is the Real Key to Nailing High-Position Intonation

This article is written by Toru Hoshino, a jazz bassist and instructor based in Japan who teaches online lessons to students worldwide. In this article, he shares the one habit that matters most when practicing intonation in the high positions.

In the online community I run, “Bebop Practice Group,” we’re currently working through tunes that use the high positions a lot. It’s genuinely tough — upright bass especially makes you feel just how unforgiving intonation can be up there.

The higher up the neck you go, the narrower the spacing between notes gets, so even a tiny slip becomes much more audible as an intonation problem.

When it comes to copying a high-position line, I keep coming back to the same, almost too-obvious conclusion:

Listen to the phrase closely. Really closely.

That’s really what it comes down to.

When you’ve listened closely enough, you build a mental image of exactly what that phrase’s pitch should sound like. Then, the moment you play it even slightly off, you catch it yourself — “oh, that wasn’t quite right.”

On the flip side, if that mental pitch image stays vague, you’re much more likely to end up not even knowing what note you’re currently playing — especially up in the high positions.

Nailing a specific high-position note on the first try, especially on upright bass, is genuinely difficult. That’s exactly why training your ear to hear the correct pitch in your head — before your fingers even move — matters so much.

I’ve been getting back into high-position practice myself recently, and it’s been really rewarding. There’s nothing quite like the feeling of nailing a high-position note dead center.

Pitch in the high positions is exactly the kind of thing that’s hard to self-diagnose — your ear adjusts to your own slight inaccuracies without you noticing, which is where a second pair of ears really helps.

Want Personalized Feedback on Your Playing?

This is exactly the kind of thing that’s hard to fix alone — and where having a teacher makes all the difference.

At Line on Bass, I offer an online lesson service where you send me a video of your playing, and I give you specific, detailed feedback — every single day if you want.

Students from around the world are using this to fix exactly these kinds of issues and steadily improve their jazz bass skills.
Check Out the Lesson Service →

Posted on Leave a comment

5 Jazz Standards Arranged as Solo Bass Pieces for Upright Bass (Free Sheet Music)

This article is written by Toru Hoshino, a jazz bassist and instructor based in Japan who teaches online lessons to students worldwide. In this article, he shares five jazz standards you can play as a complete solo on a single upright bass — sheet music included.

Who This Article Is For

  • You want to try solo bass but aren’t sure where to start
  • You play upright or double bass and want to play jazz on it
  • You want to be ready for the moment someone says “take a solo” at a session
  • You want to learn solo bass lines for well-known jazz standards

The video below covers five solo bass arrangements, each with full sheet music. Save it and use it in your practice.

The 5 Songs in This Video

  • Autumn Leaves
  • Fly Me To The Moon
  • Moon River
  • Summertime
  • Pink Panther

These are all jazz standards, and each one is arranged to stand on its own as a complete solo bass piece — so they work whether you play upright bass or electric bass.

Watch the Video

You can see the sheet music for each song right in the video.

You can also download the sheet music here — feel free to use it:

https://www.dropbox.com/scl/fo/1i4i3yhbxjr1eftsa91eh/ABRUmj94wV6Nkc9vqwhCTMw?rlkey=aa9xf0aieaz0p5t7ukfzb08ed&st=tv7wkjeg&dl=0

Subscribe to my YouTube channel here for more bass content like this.

Thanks for reading this far — working through arrangements like these is exactly the kind of practice that benefits from a second pair of ears checking your timing and phrasing.

Want Personalized Feedback on Your Playing?

This is exactly the kind of thing that’s hard to fix alone — and where having a teacher makes all the difference.

At Line on Bass, I offer an online lesson service where you send me a video of your playing, and I give you specific, detailed feedback — every single day if you want.

Students from around the world are using this to fix exactly these kinds of issues and steadily improve their jazz bass skills.
Check Out the Lesson Service →